How to Make Your Own DIY BinoHarness for Free
 Article | Posted by Best Binocular Reviews
 In this article and the embedded video below from the BBR YoutubeChannel, I’m going to show you how you can make this very cool, improvised binocular harness that will enable you to comfortably carry just about any binocular and all you need is a piece of cord or even an old shoe string, a multi-tool so something like your Swiss army knife and a suitable small branch from a tree!
This morning I was about to head out to do some low light comparison between some binoculars I’m testing for reviews, and thus because I carry a bunch of gear with me, I really needed a BinoHarness.
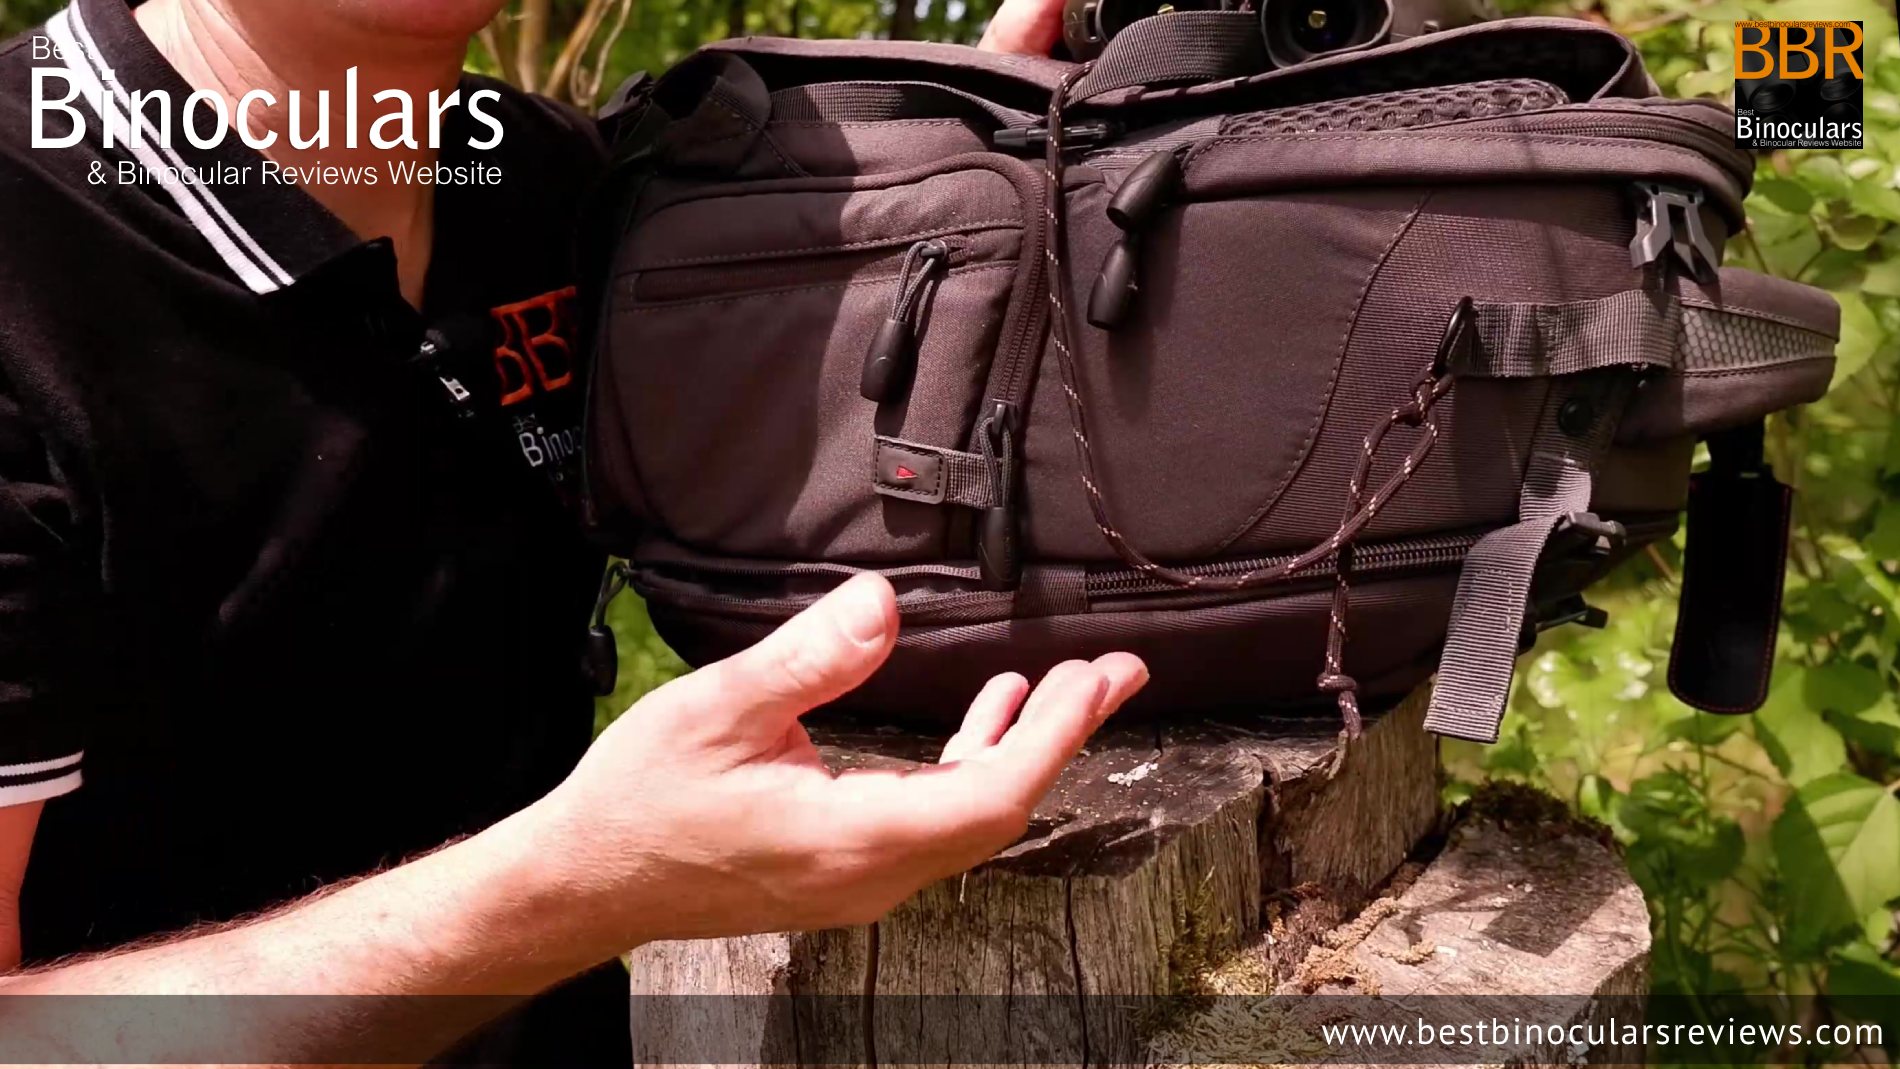
I do have a number of harnesses that are suitable for standard binoculars and even quite large ones but when you start getting instruments that are completely oversized like the Steiner Nighthunter 8x56 binoculars (which is for my money one of the best low lights performing binoculars out there), but whilst very comfortable to hold in the hands, they are big and because of this and the porro prism shape, there are not many commercially available binocular harnesses that will accept them.
I do actually have one that can carry it – take a look at my Cotton Skout Harness Review, but for the life of me, I couldn’t find it!
DIY Bushcraft Rope Tensioning System
I then remembered back to a bushcraft trick on how to make a Rope Tensioning System that I saw on youtube and wondered if I could adapt it to work as an improvised binocular harness.
Using nothing but a cord and a small piece of wood that you cut from a branch and make a hole through it using a multitool, you can have a really effective rope tensioning system that makes it much easier to group and carry things (like a stack of wood for the campfire for example).
On top of this, this clever system not only locks in place making it secure, but it is then much easier to open up and release than if you were to tie a knot in the cord.
Free DIY BinoHarness
By using this system and then fixing it to my backpack, I did indeed manage to make what I think is a very effective and easy-to-use BinoHarness, that can carry even large and heavy binoculars quite comfortably (as long as the straps on your backpack are well-padded).
To make your own version of this DIY binoharness – take a look at the video at the top of this page, or just follow the steps in the images below:
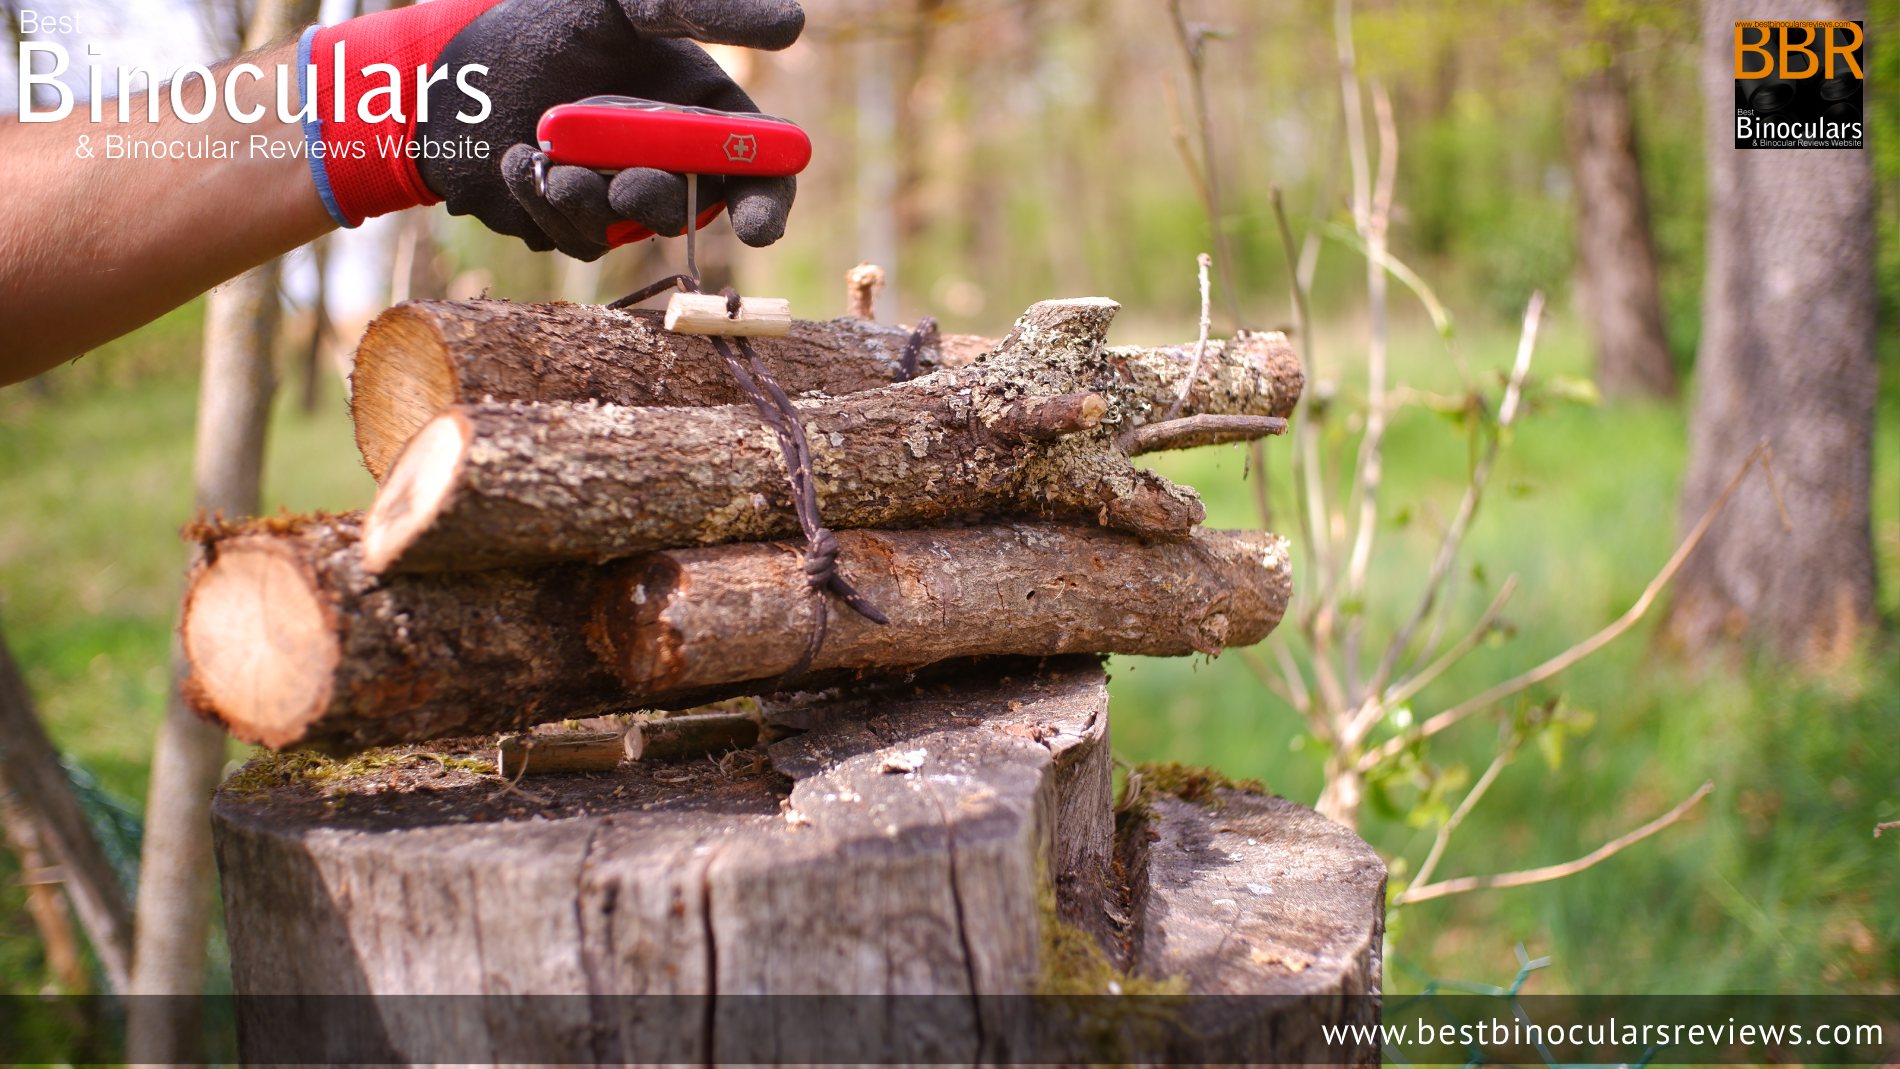
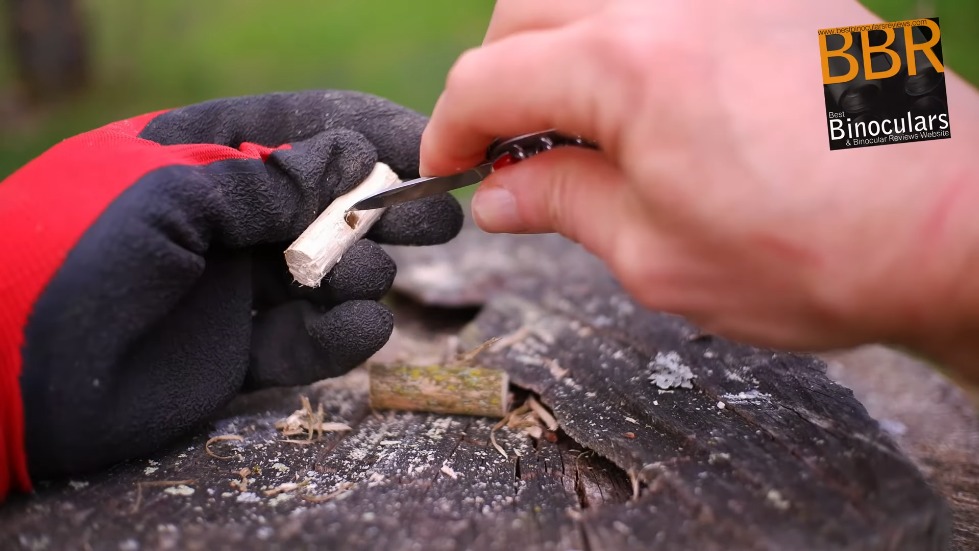
Step 1
Look for a suitable small branch and cut it, the small saw on a multi-tool like this Swiss army knife works well:

Step 2
For the locking mechanism, you need a piece that is about an inch long with a diameter that is large enough to drill a hole through which you can then thread your cord:
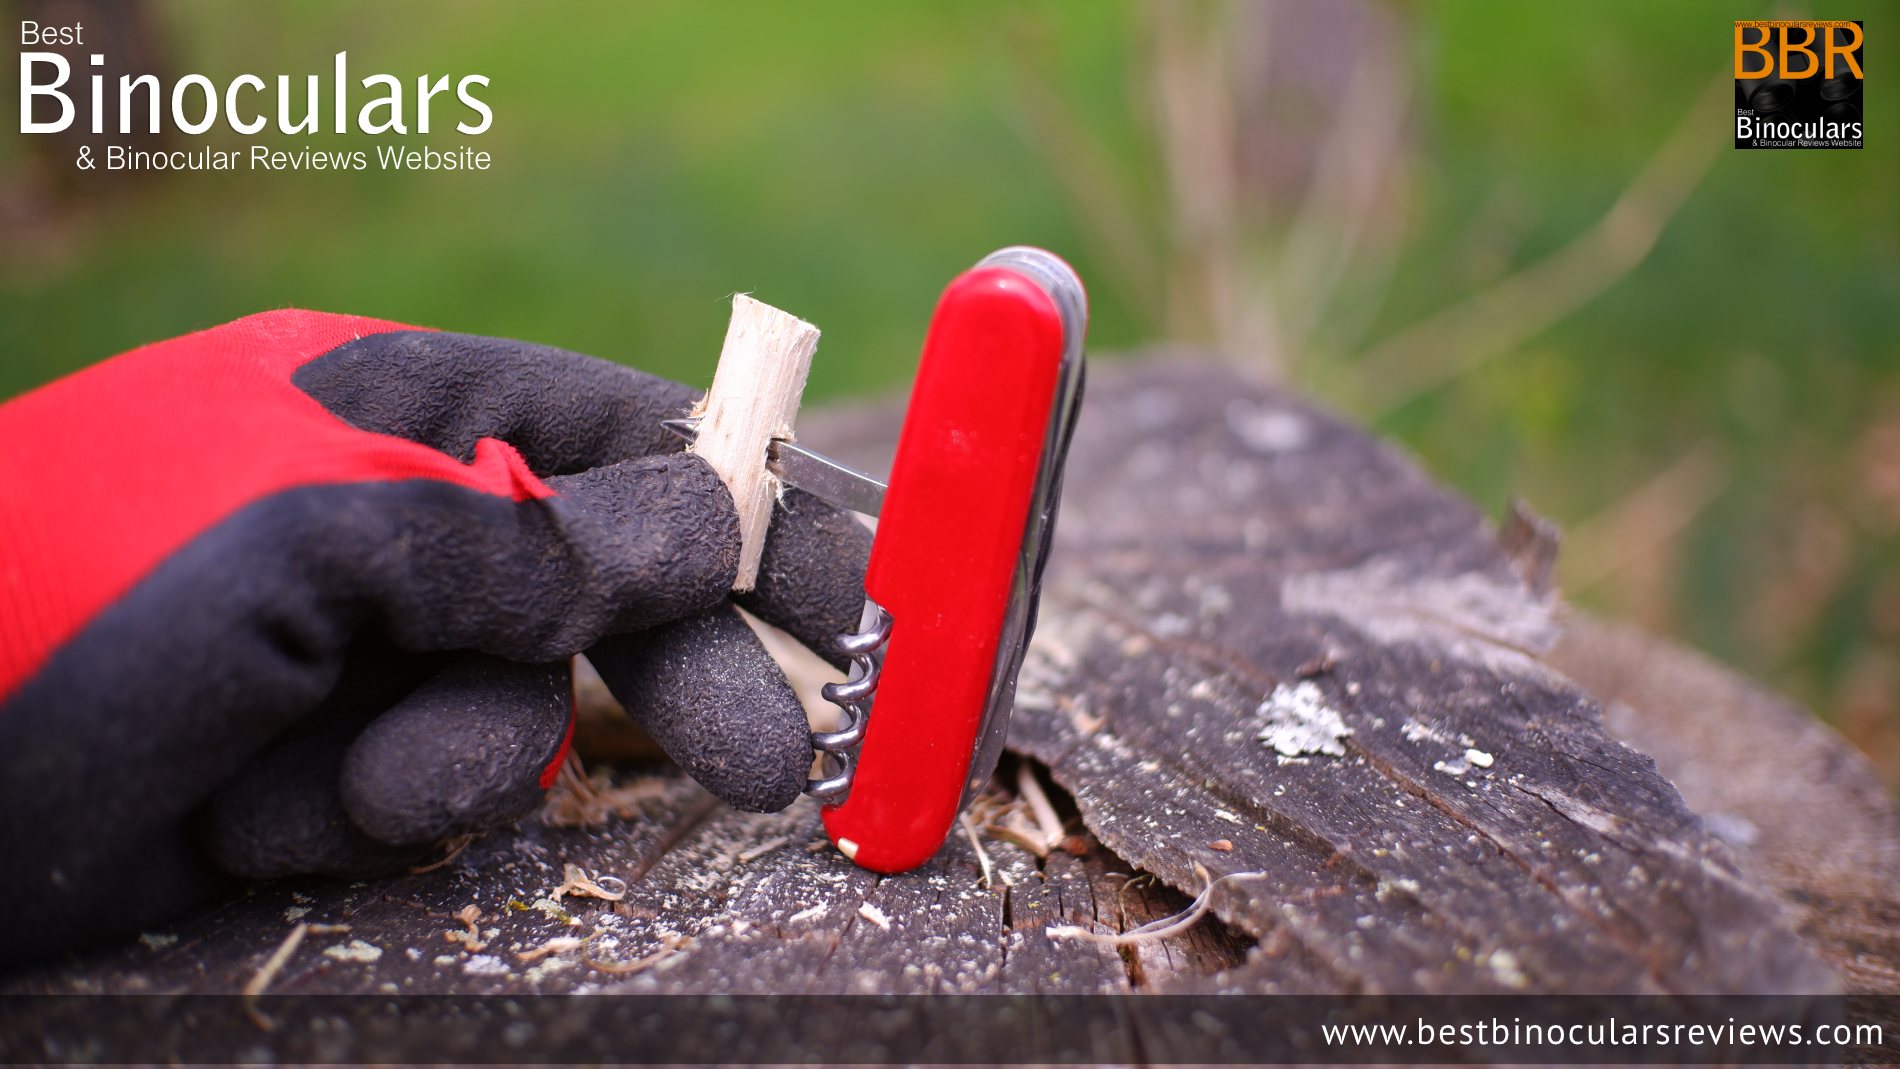
Step 3
Clean up the piece of wood and then use a drill or the awl on your multi-tool to drill a hole through it
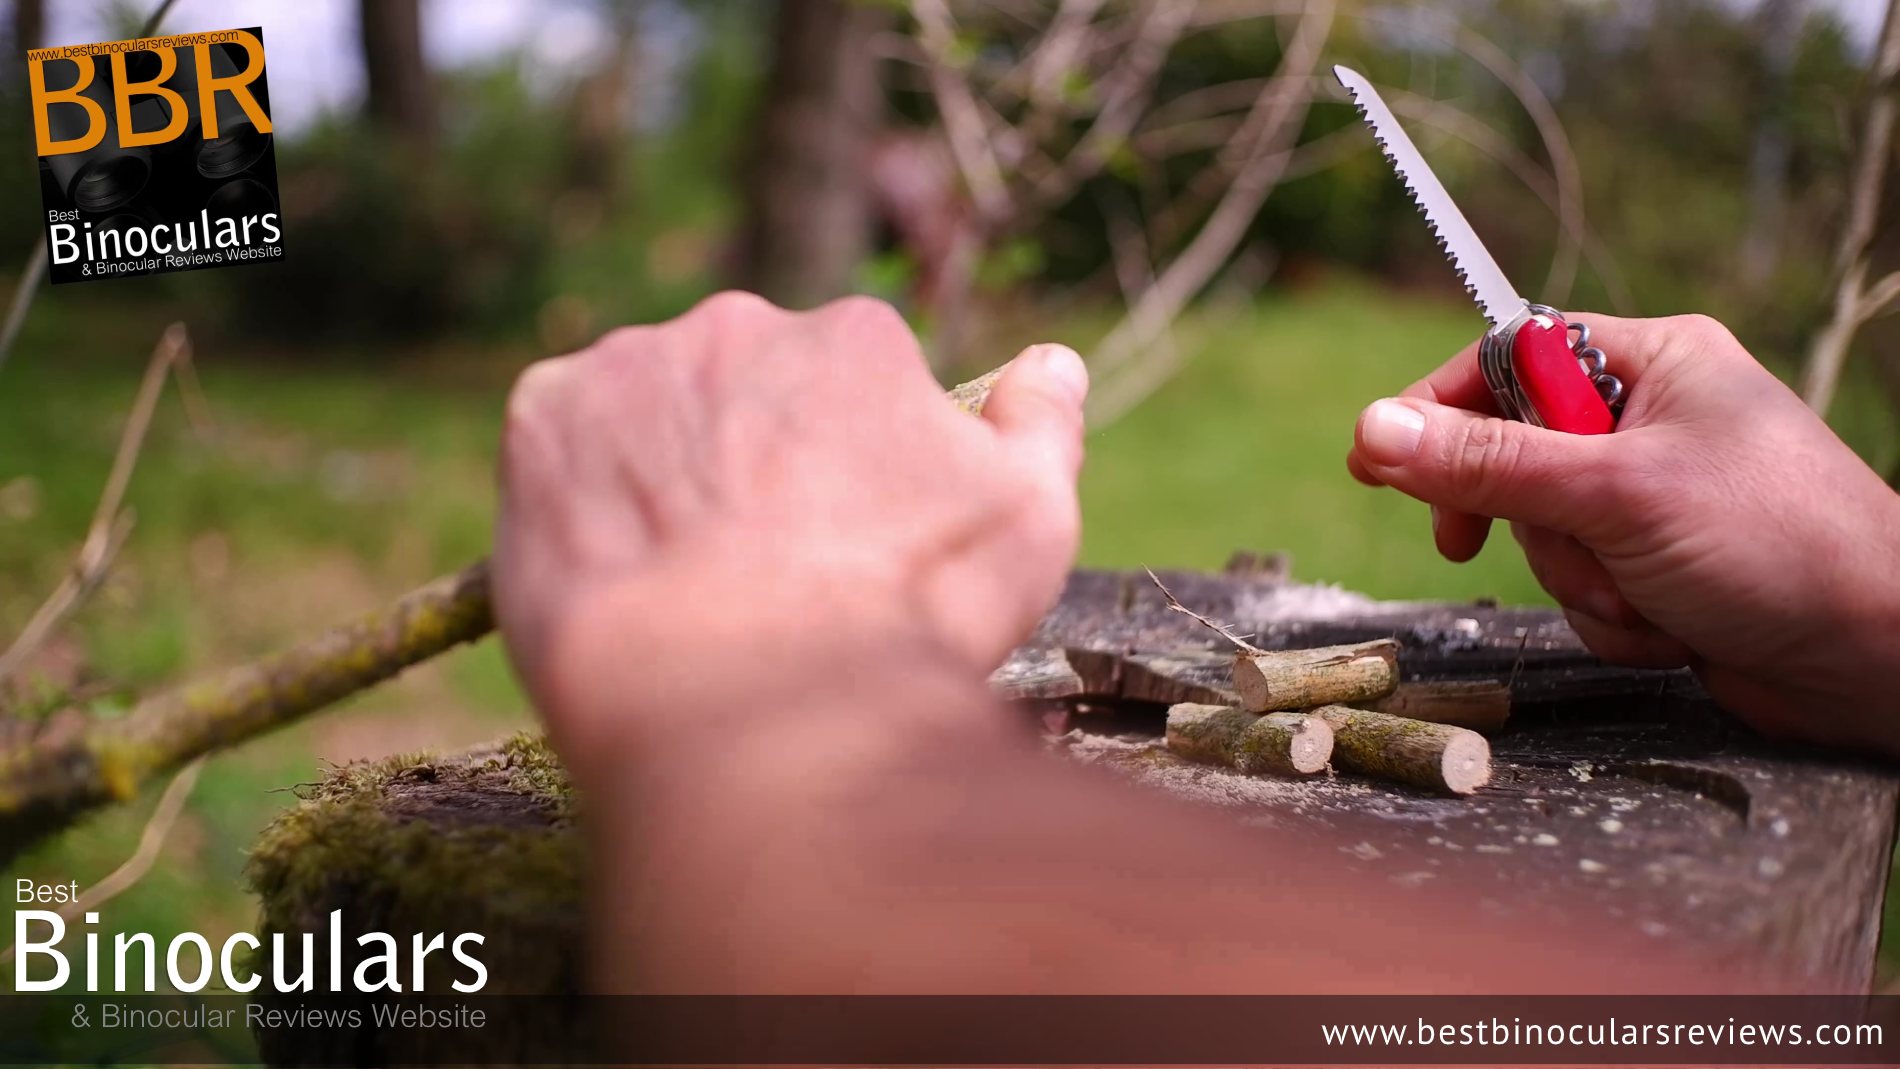
Step 4
Clean up your section of wood and the whole through it to make it nice and neat using the small penknife – you have what I will now refer to as a wooden bobble!
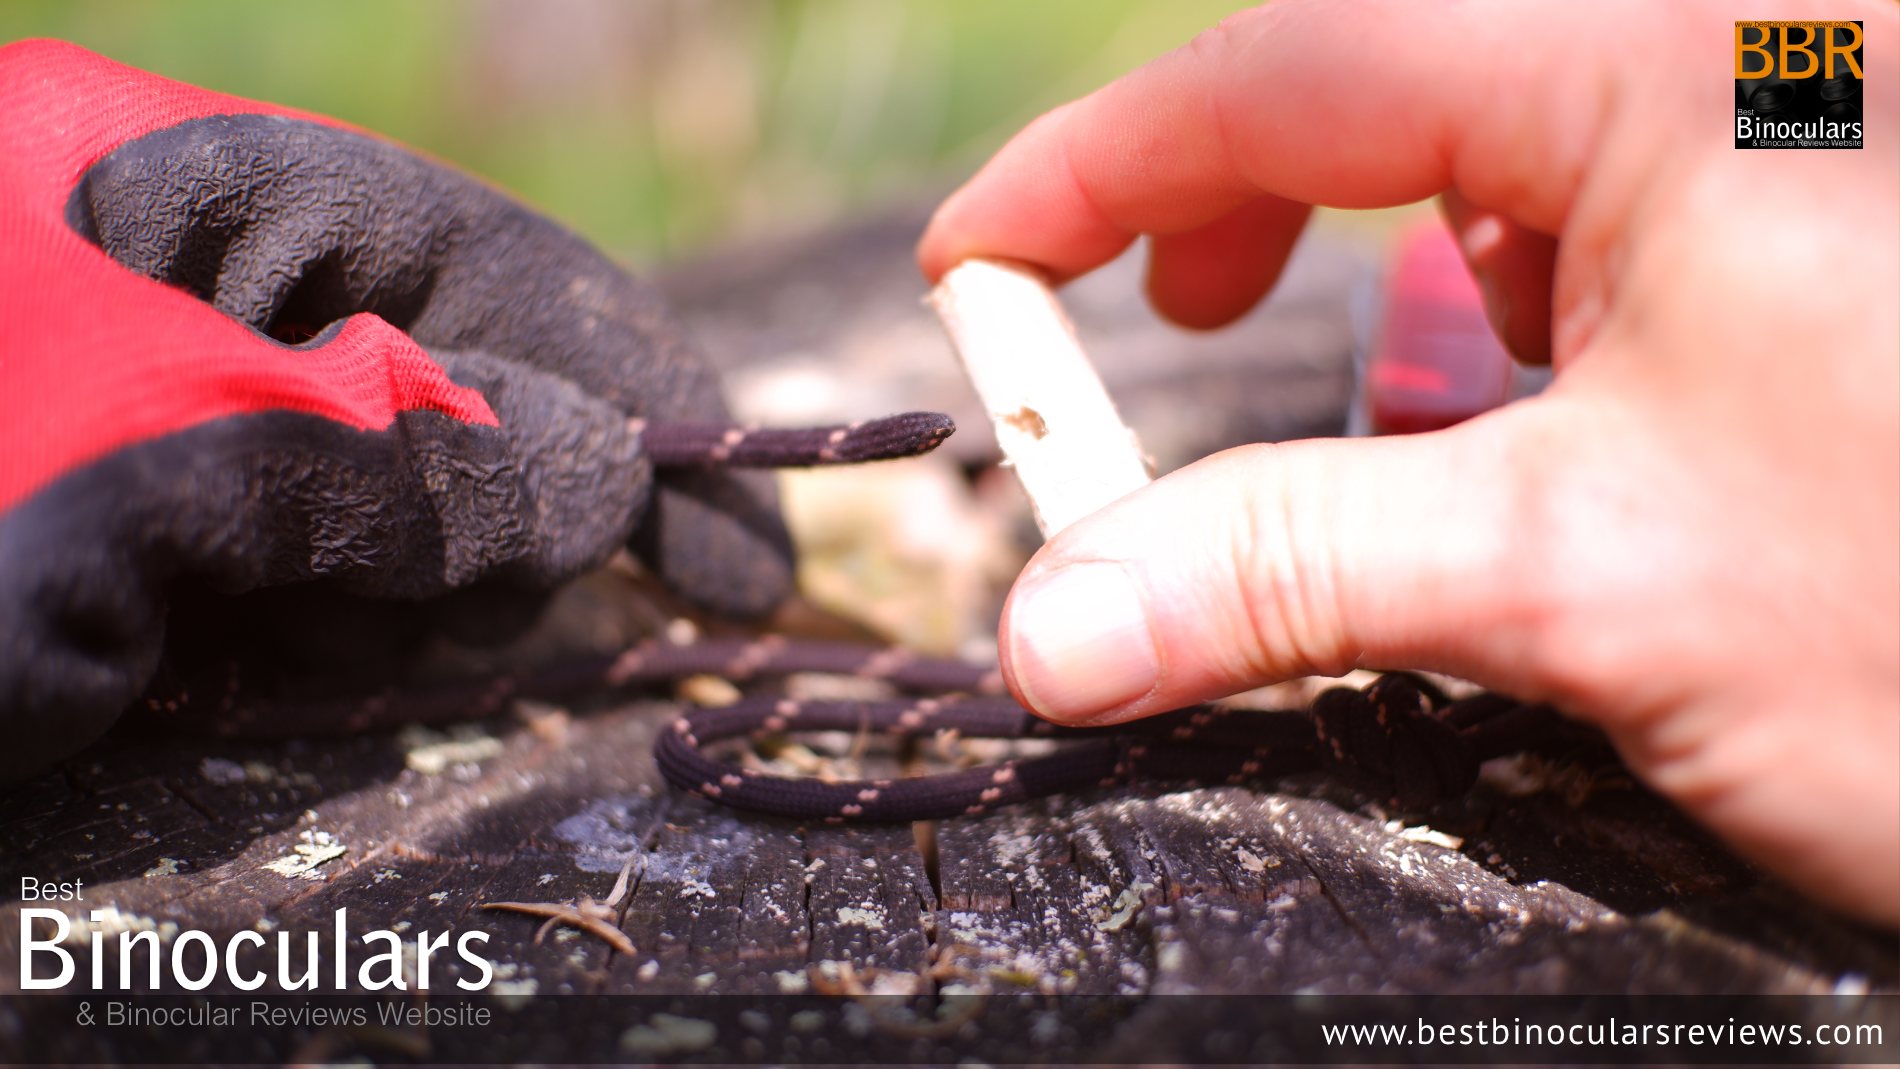
Step 5
Get your cord or old shoelace and tie a knot to make a loop on one end – not that this loop should be large enough to thread over the wooden bobble that you have just made.

Step 6
Thread the other end of your cord through the hole in your wooden bobble:
Step 7
Tie a simple knot on the other end of your cord to prevent it from slipping through the hole in your bobble:
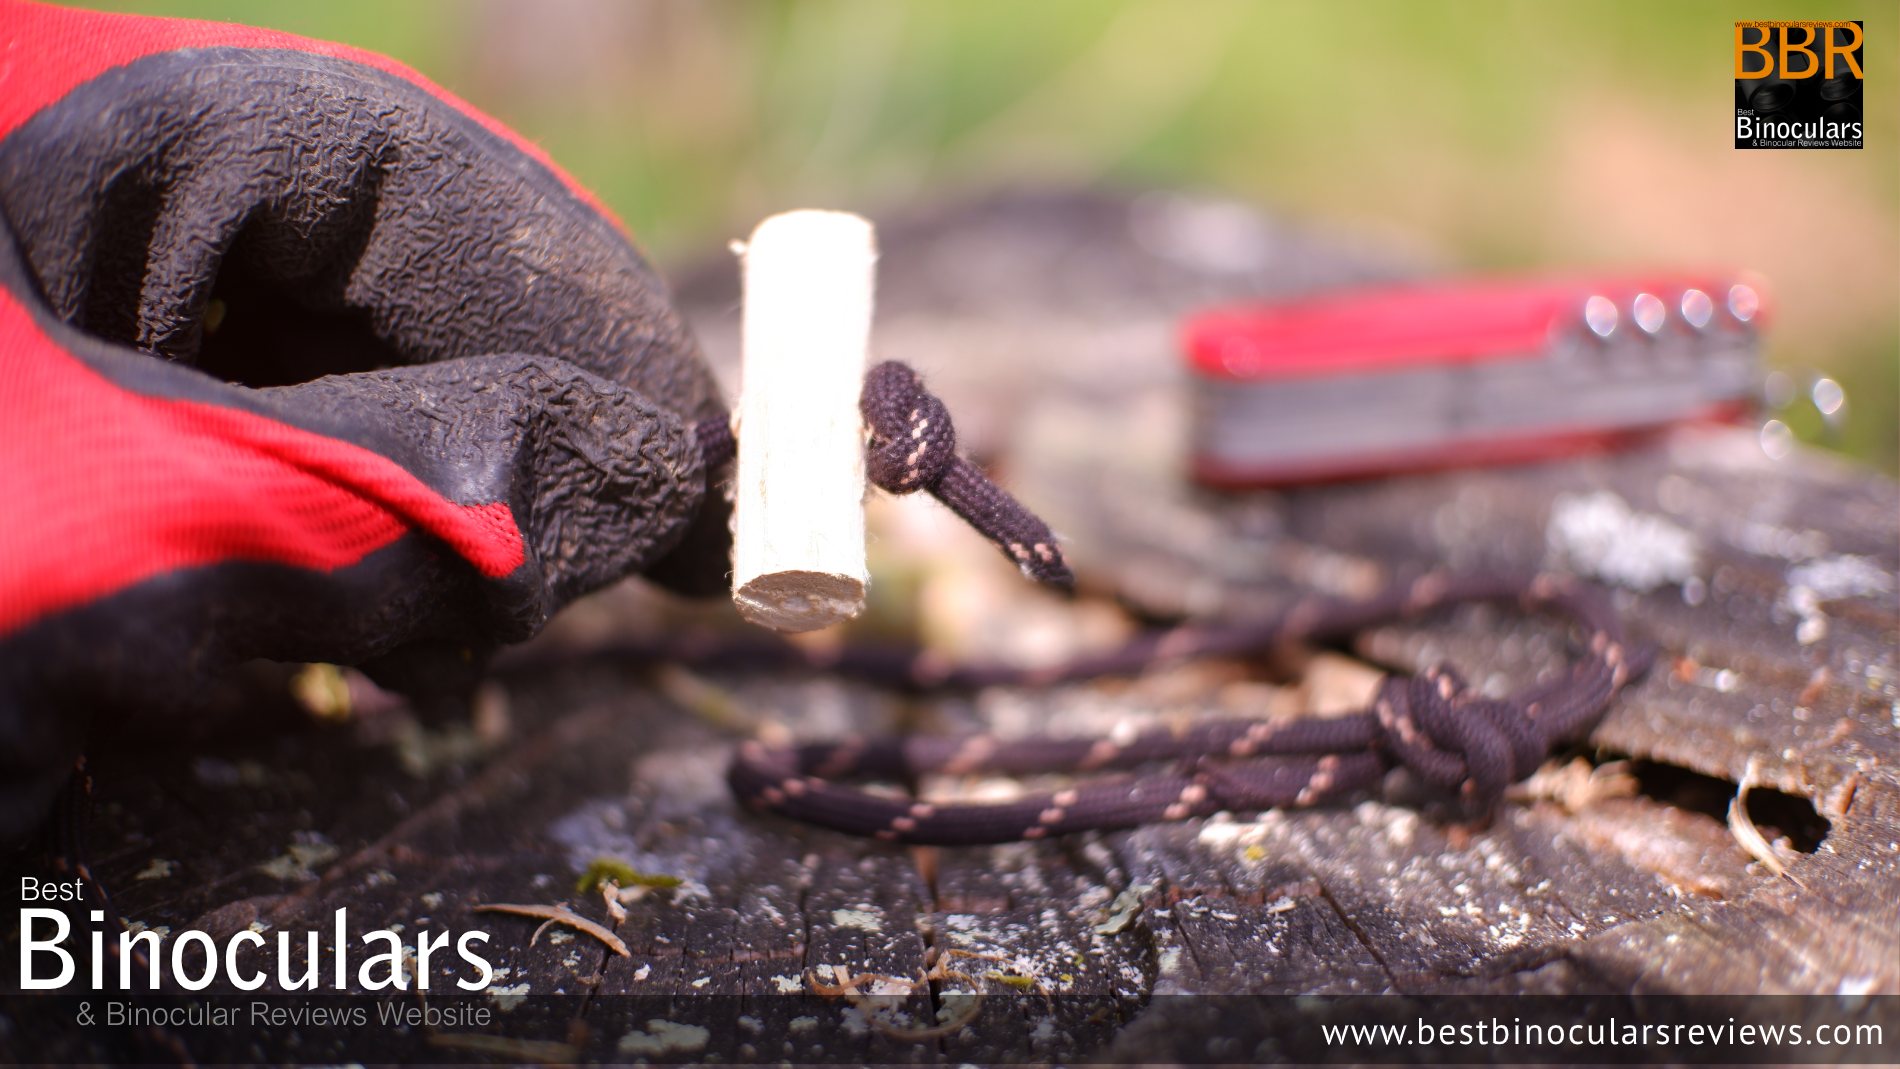
Step 8
You should now have a length of cord with a simple knot on one end, a fixed noose on the other, and your wooden bobble threaded in between.
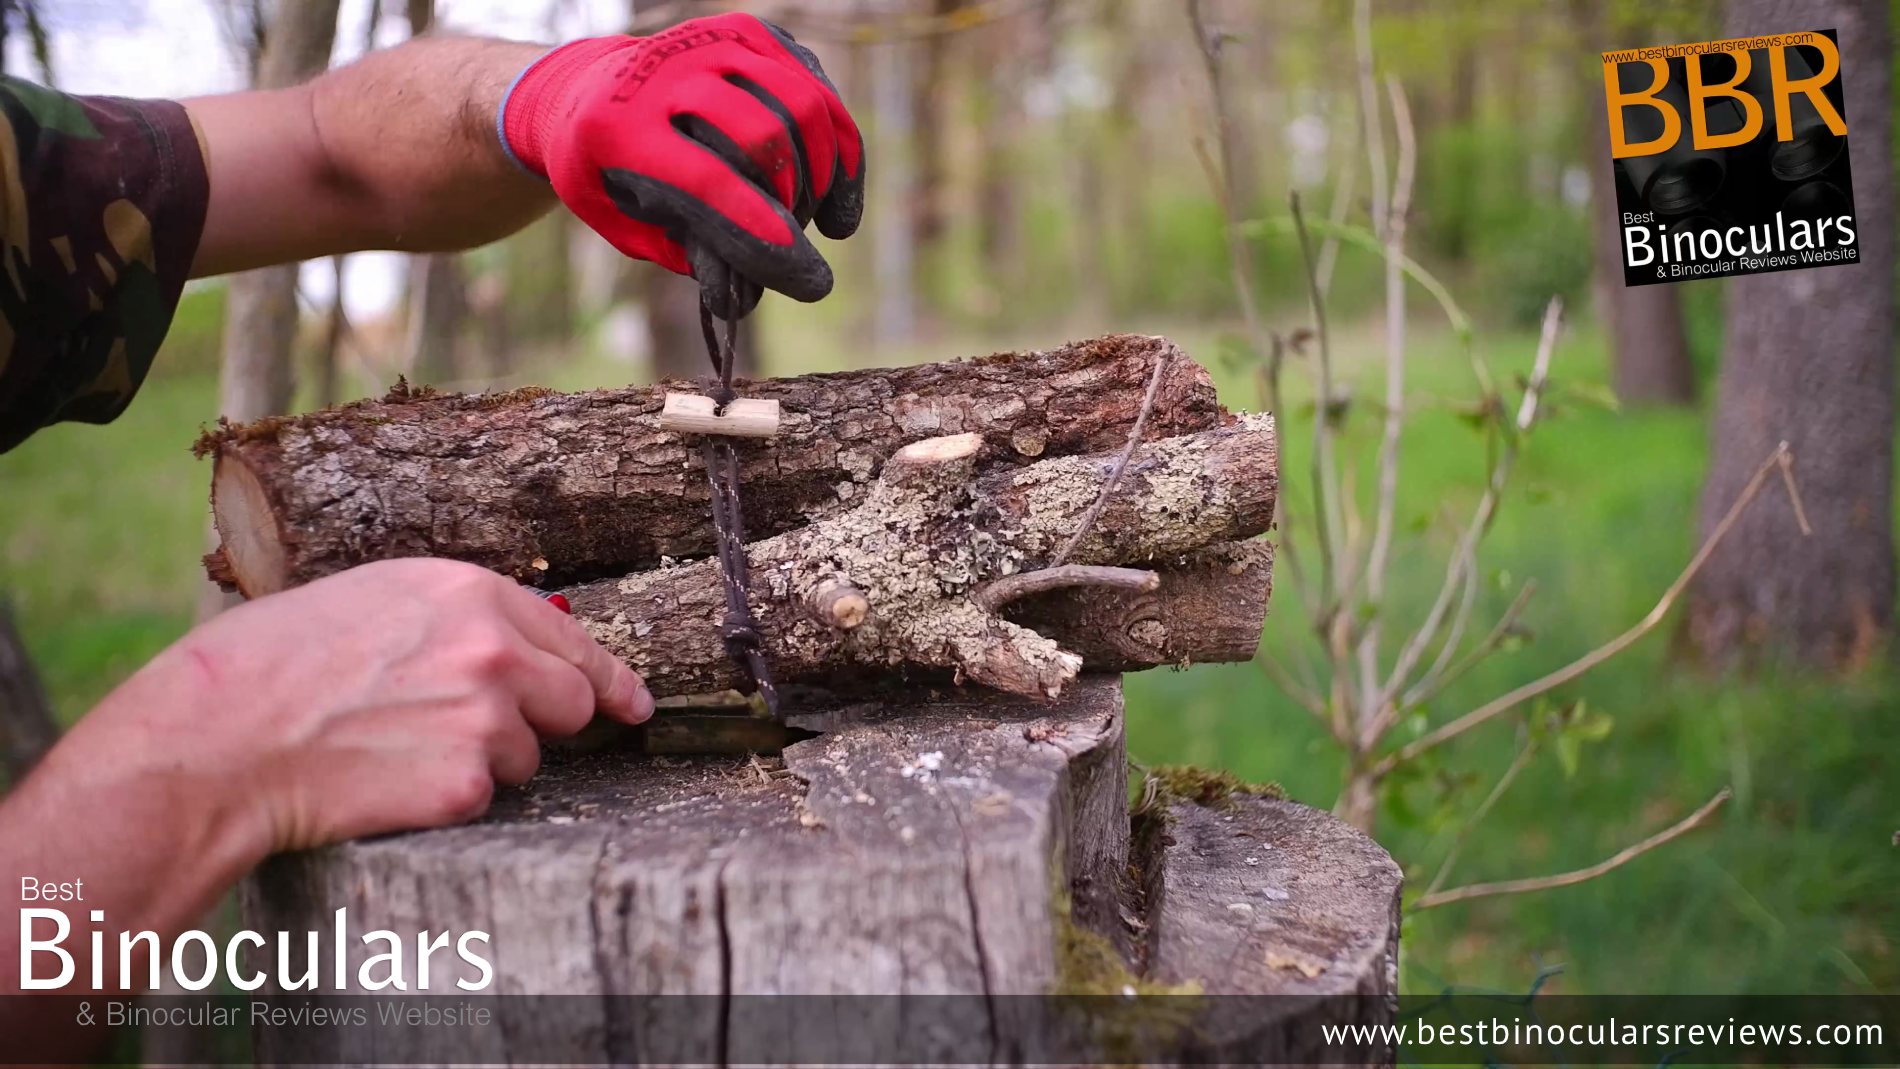
Congratulations, you have made a very easy, but also very effective DIY Bushcraft Rope Tensioning System – you use it you simply wrap the cord around whatever you want to carry, loop the noose over the bobble and then pull the other end of the cord until it locks tightly and securely in place. This is easier to see than explain, so here I suggest you take a look at the video if the image below is not clear enough for you:
Step 9
To turn your tensioning cord into a binoharness, first, tie the end of your cord (the end with the simple knot) to a suitable point somewhere near or on the top of your backpack, a looped connector or even the carrying handle will work:
Step 10
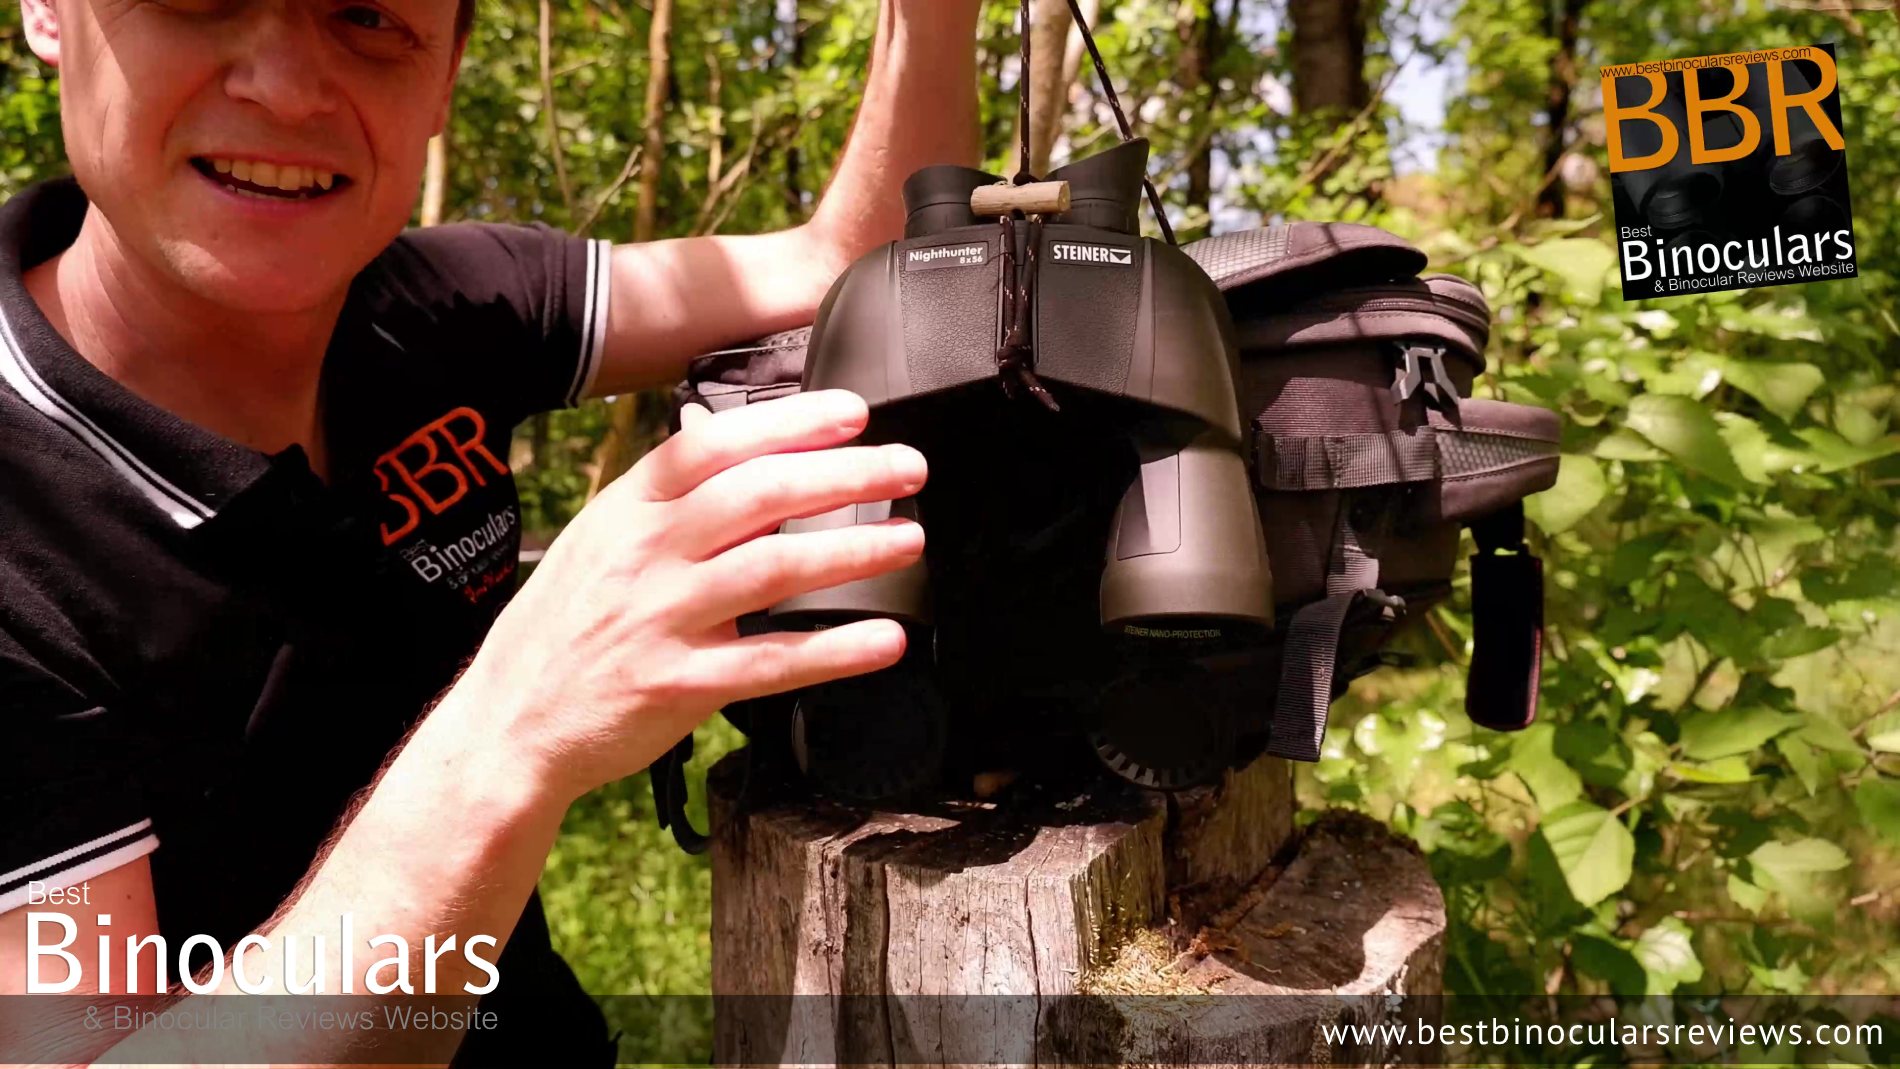
Wrap the noose end of your cord around the hinge of your binoculars in between the barrels and the eyepieces – to enable your binoculars to hang as straight as possible try and get it as close to the center as possible, you will have to make adjustments or concessions depending on your particular model and where the focus wheel is located.
Then wrap the noose end over the bobble and pull tight:
Step 11
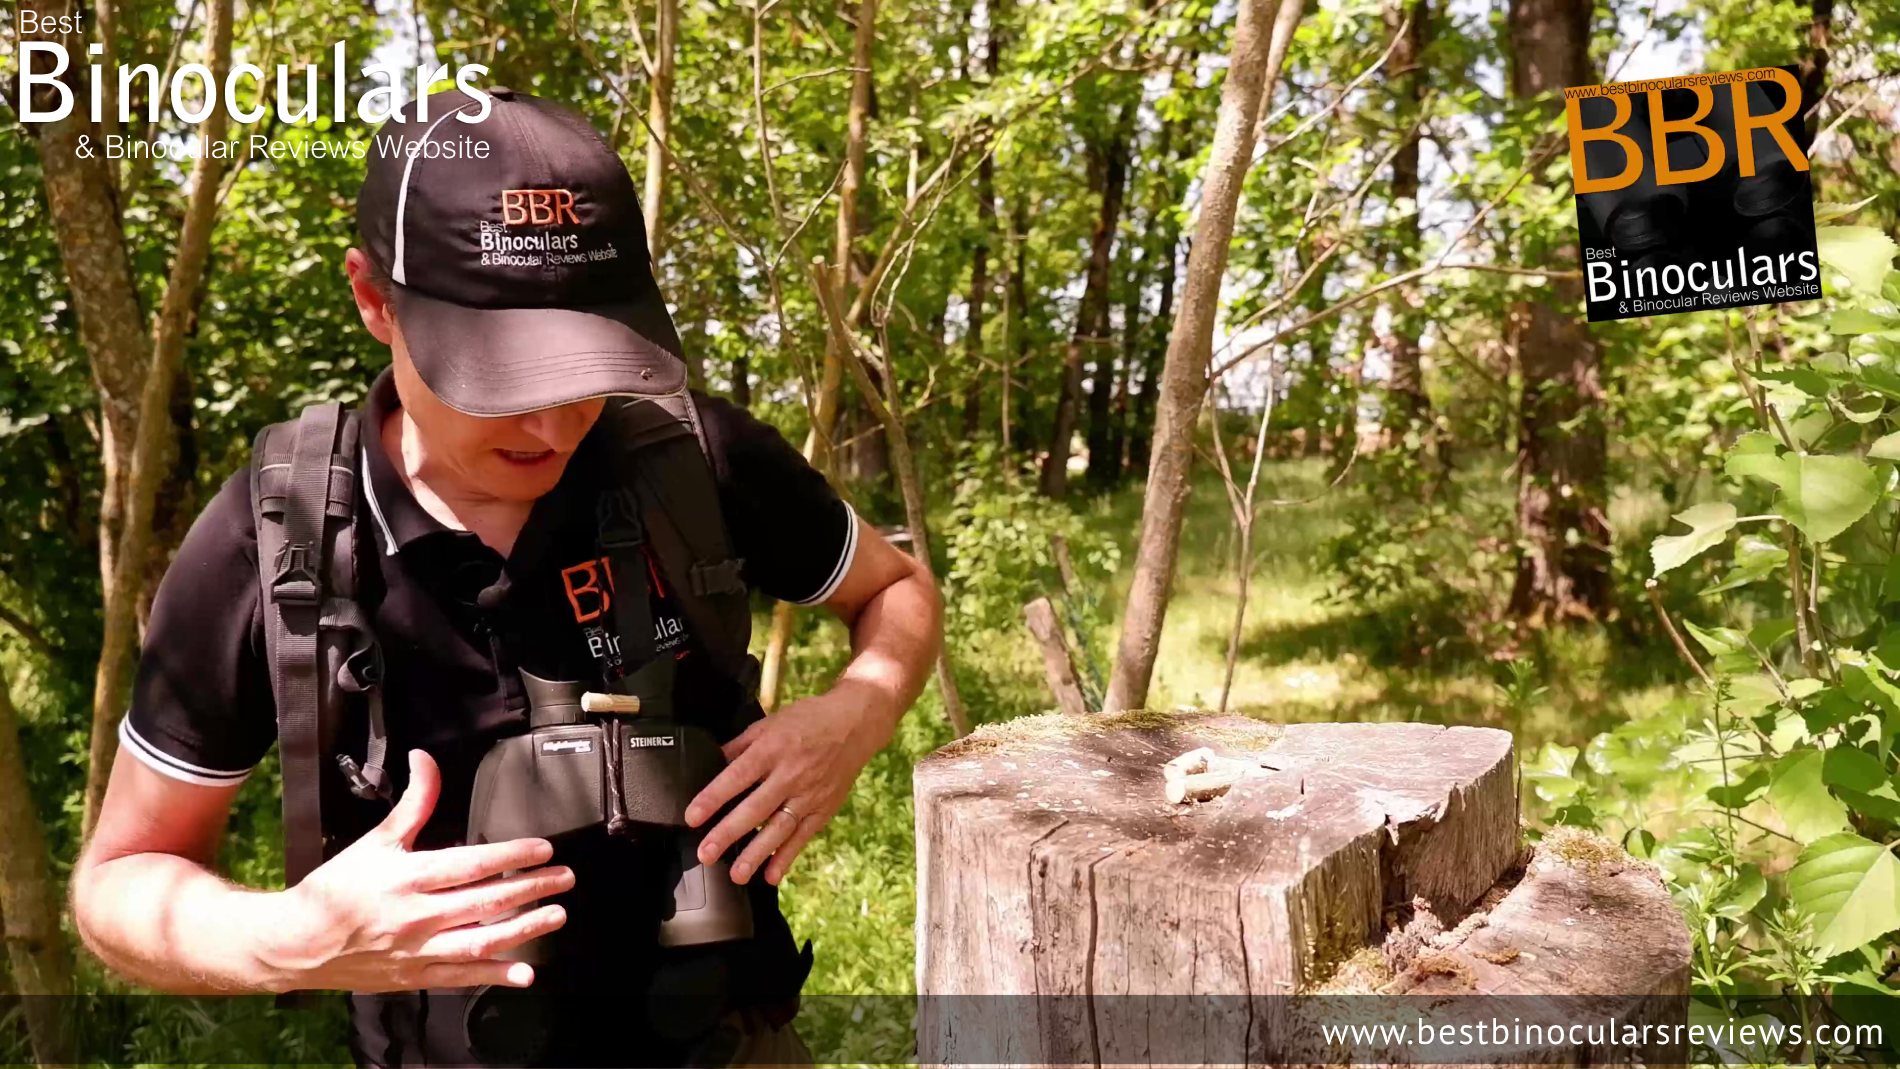
Put your backpack on and pull the cord over your shoulder. Hey presto, you should now have your very own, free improvised binoharness:

Best Binocular Harness?
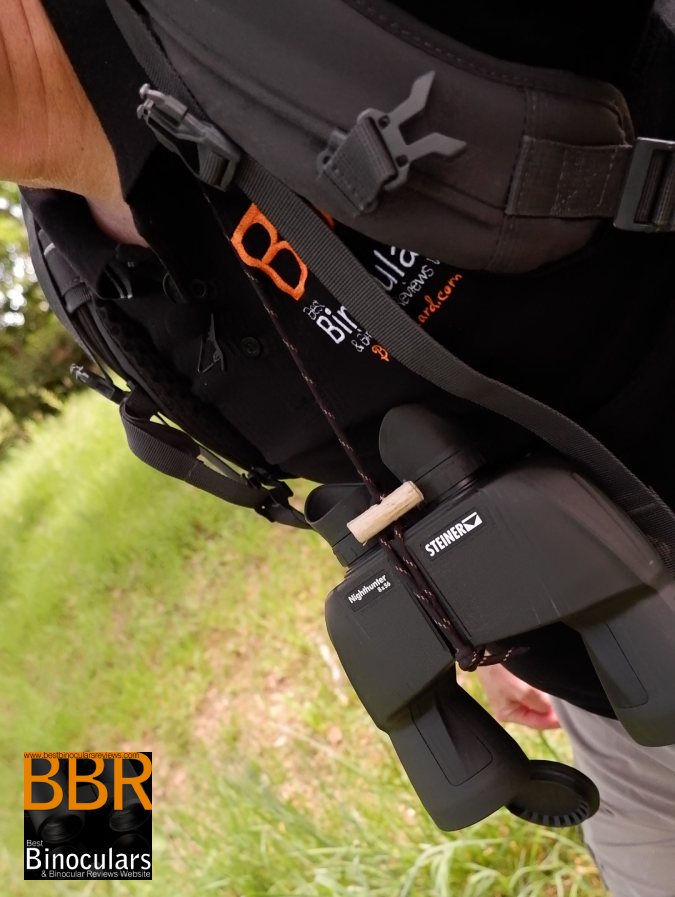
You may need to adjust the length of your cord to get it just right and if you want to remove your binoculars, as before, you simply just twist the bobble sideways to release the locking mechanism on the tensioned cord.
I have to say the one I made works extremely well and combined with my backpack, it makes it very comfortable to carry large and heavy binoculars.
So is this the best binocular harness out there – no, but considering it cost me almost nothing, I am really pleased and it certainly got me out of a bind.
So if you aren’t able or willing to purchase one (see links below for some options and my reviews), then I think that this is not only a viable option, but is a fun little project and the cord tensioning system it is based from is definitely a bushcraft skill worth knowing as it can come in handy for many other uses.
Credit:
In this regard, be sure to check out FelixImmler’s youtube channel who gave me the idea to make this BinocularHarness with his video on how to make DIY Rope Tensioning System https://youtu.be/UZY0ps8Stz0
Further Information
- BBR Binocular Harness Strap Guide
- Cotton Skout Harness Review
- Best Binocular Harness for Hunting
- Best Binocular and Rangefinder Harness
- S4 Gear Lockdown Bino Harness
- Kuiu vs Badlands Bino Harness
- Steiner Nighthunter 8x56 binoculars Review
- My video on How to Make Your Own BinoHarness for Free on youtube

 Categories: Accessories, BinoHarness |
  Tags: Advice, Binocular Harness, tips |
  Comments Off on How to Make Your Own DIY BinoHarness for Free