The Basics: Birding with Binoculars – Aiming
 Article | Posted by Best Binocular Reviews
Using your Bird Watching Binoculars
It was recently pointed out to me by a friend of mine that my main Guide to Birdwatching Binoculars was for her, a little too technical and did not help her enough with the practical aspects of actually using binoculars for birding. As a beginner, she just wanted to know the basics to help her get started. So with this in mind, I have decided to publish a series of short articles, covering the basics for those new to bird watching or even keen birders that a new to the the world of optics.
Quickly Find the Bird in the Field of View
One of the most common problems I hear about is of people finding it difficult to locate the bird in their field of view . Indeed when I was working as a safari guide, it was not uncommon for me to see people really struggle to locate what they wanted to see through their optics. They had obviously just bought a pair of binoculars, especially for their safari, but had not used them very often.
Being able to quickly locate your subject, especially if it is something like a small fast moving bird is obviously important and there are a few things that you can do to help with this:
Aiming your Binoculars
Practice Makes Perfect – As with most things, you get better at something the more you do it and this includes using your binoculars, but apart from a good pair of binoculars with a reasonably wide field of view, here are also a few tips to help you get started.
For me to write this, I had to really slow down and think about each step of what I do when I spot a bird (or anything else) that I want to take a closer look at. Indeed I even reenacted my movements because after a while they just become one natural movement and you do them without thinking about it and that is the point – Practice Makes Perfect and something that I take for granted may not be that obvious to someone doing it for the first few times:
1) Line Up – I think that this is one of the most important steps – you need to square yourself up to the bird and this includes whole body, including your feet, which should turn to face the bird. If you just turn your head, it makes spotting quite a bit more difficult as your whole body is out of balance.
 2) Grip – Buy holding your binocular “correctly” and in the right position, they will correctly balanced making it easier to locate and stay with your target. So what is the correct way to hold a pair of binoculars?
I would not say that there is a hard and fast rule, but most people hold a binocular with their thumbs under each barrel and their forefingers wrapped around them. This keeps them steady and also means that you can use either index finger to rotate the focusing wheel without having to change your grip.
I also often see people trying to look through binoculars using only one hand as their other one is holding onto a bird book or something. This will make it harder to locate the bird and keep the binoculars still, so if possible always try and use both hands.
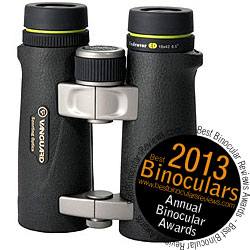
Most modern binoculars like the Vanguard 10x42 Spirit ED Binoculars, used as an example in the image below come with thumb indents under each of the barrels of the binocular. These thumb indents are not there to force you to hold them in a particular way, but do just enough to encourage you so that you do anyway. Thus without even thinking about it, you end up holding them in the correct way and in the correct location to make sure they are nicely balanced.

3) Look at the Bird – Position your head so that you’re looking straight at the bird. Make sure that your whole head is pointing towards it and not just your eyes looking up. This is more important than you may first think as you will see in the next step:
4) Use the Binoculars – Now put your binoculars squarely in front your eyes and if you have followed the previous steps, more times than not, you will see the bird right in your field of view, without having to look around for it.
As I said earlier, whilst much of this may seem obvious, you need to keep doing it until it all becomes second nature and over time you will do it without even thinking about it.
Field of View
As well as being able to correctly aim your binoculars, the actual view that you see through them can also be important aspect in making sure that you can quickly locate the bird.
The horizontal width of the image that you can see through the binoculars is called the field of view (FOV). Obviously the wider your field of view, the easier it will be to locate and place an object (like a bird) inside it when you look through your binoculars.
Optics manufacturers often publish the field of view as a number of feet wide at a distance of a thousand yards (or number of meters wide at a 1000 meters) or it is sometimes expressed as an angle.
I have a page on the site that lists some very Wide Angle Binoculars, all of which have FOV’s of more than 130m wide at 1,000m (389ft @ 1,000 yards), giving them an angle of view of at least 7.4° – and whilst a nice wide field of view is always preferable, as long as you have a reasonably wide FOV, I think being able to correctly aim your binoculars is far more important than potentially spending large sums of money on a pair of binoculars that has a field of view that a few meters wider than another.
So how wide is wide enough?
For general birding and assuming that you have got your aiming of your binoculars perfected, I find that a FOV of around 100m at 1,000 meters (300ft at 1,000 yards) is usually enough to make locating even small, fast and erratically moving birds in a dense tree canopy fairly straight forward. Most good quality full size, mid and even compact binoculars with an 8x or 10x magnifications will have a field of view as wide as this or more.
So whilst the FOV is important, don’t think that you HAVE to get a binocular with a extremely wide field of view, it is more important just to make sure that the one you choose does not have a really narrow field of view. It is also something to keep in mind to help decide between two binoculars on your short list that are otherwise fairly evenly matched.
Reviews: Best Value Birdwatching Binoculars
Take a look at the Best Value Birding Binoculars that I have Reviewed
Further Reading
- Guide to choosing Bird Watching Binoculars
- Best Value Birding Binoculars
- 10x42 Binoculars for Bird Watching
Photo Credit: Main image of the Puffin by Nigel Appleton

 Categories: Binocular Buyers Guides, Binocular Terms, Birdwatching Binoculars |
  Tags: Binoculars 101, Birding Binoculars, Birdwatching Binoculars, Buyers Guide, User Guide |
  No Comments »