Carson Universal Smartphone Optics Adapter Review
 Article | Posted by Best Binocular Reviews
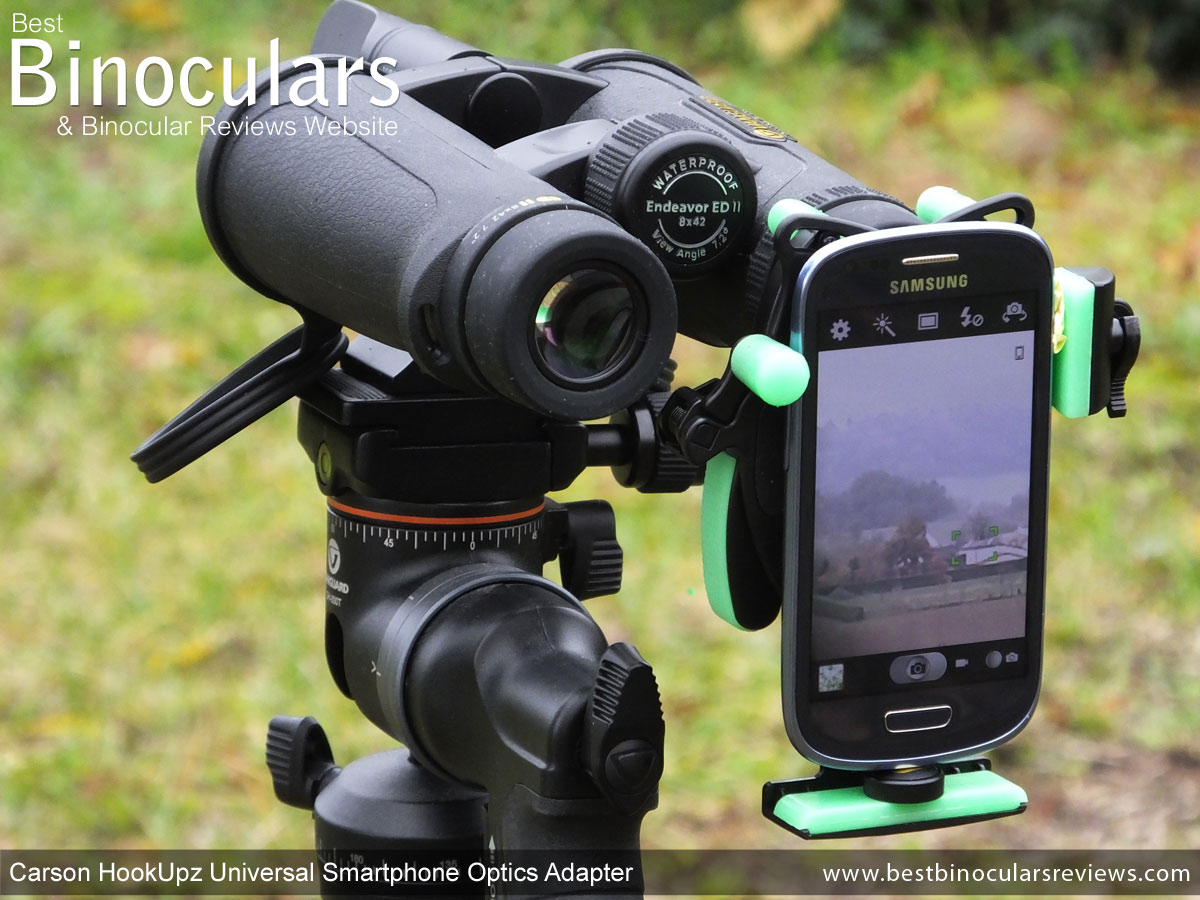
It was not that long ago that you really had to search quite hard, or possibly even make your own contraption in order to attach a camera to take photos or video through your binoculars (digibinning) or your spotting scope (digiscoping).
But with the growth in use of smart phones and the improvement in quality of their built in cameras, smartphone optics adapters have become more and more popular and there is now a wide range to choose from. However many only work with the iPhone and on only some scopes and binoculars.
Carson HookUpz Universal Adapter
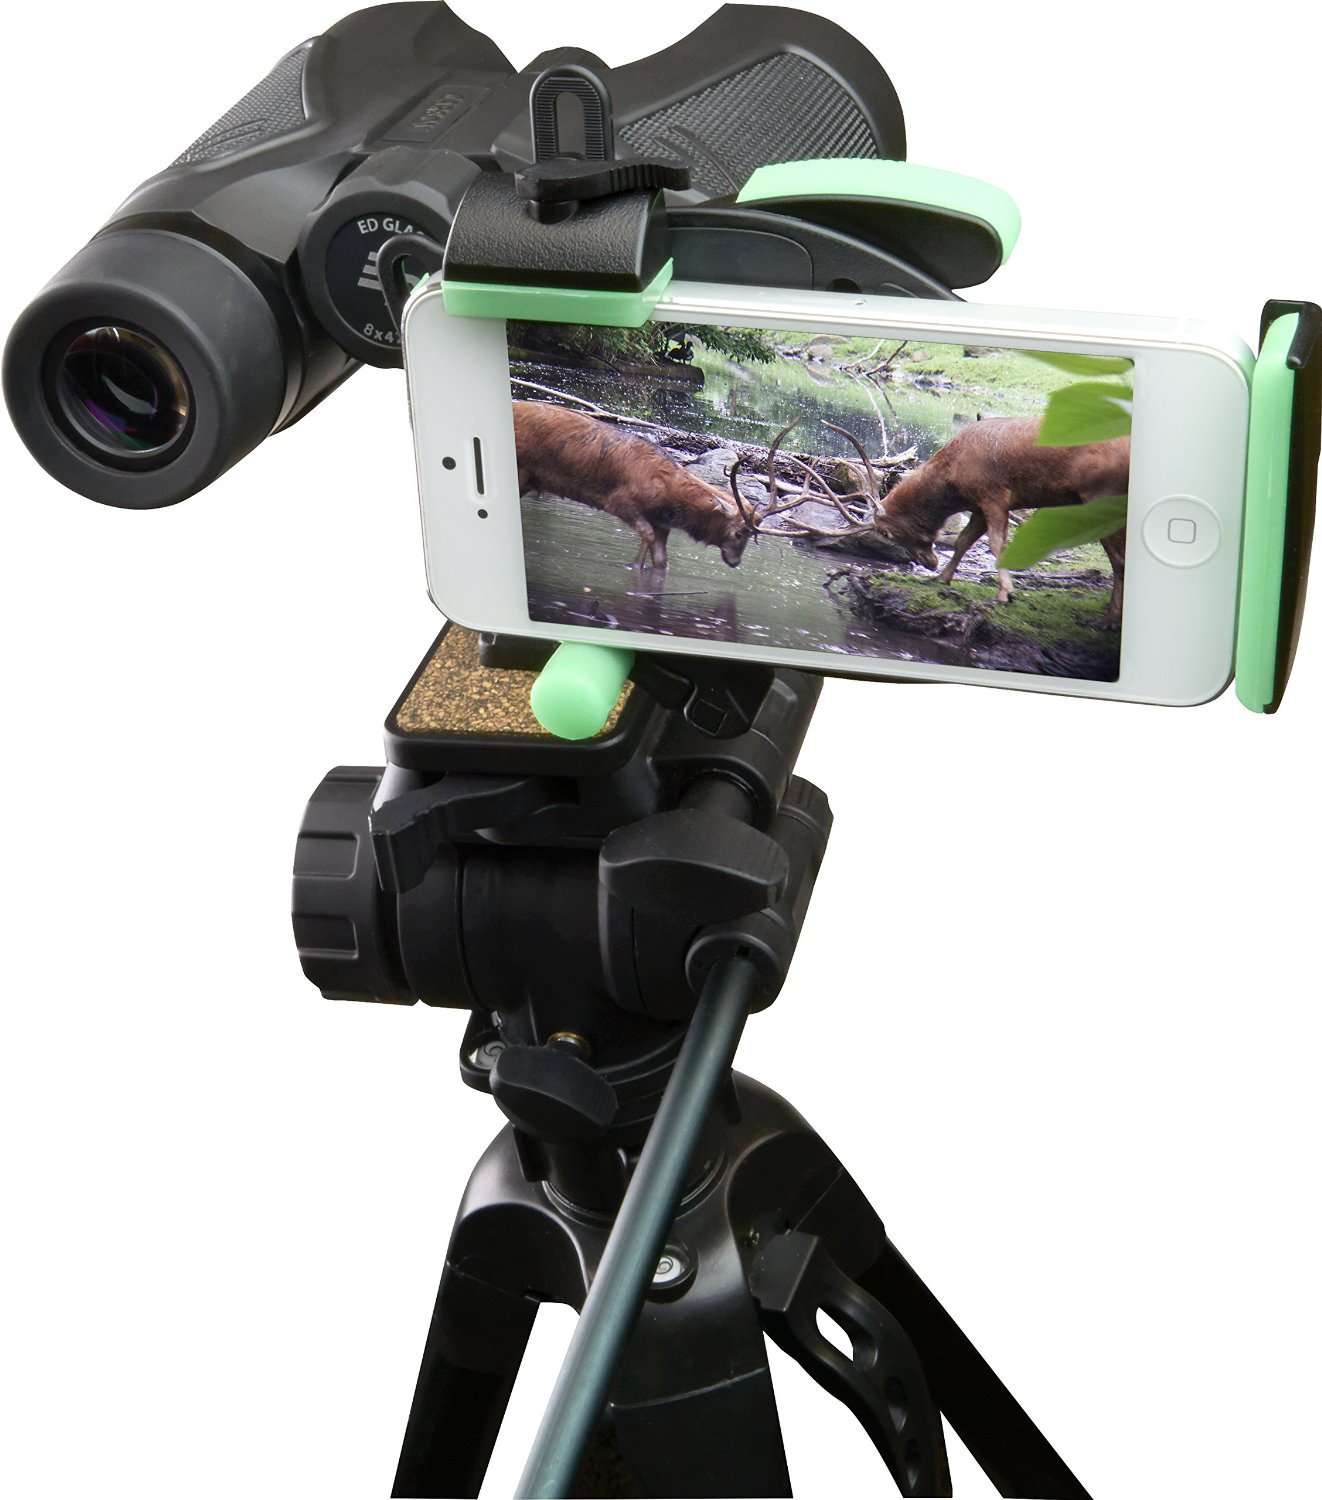 Carson’s latest optical adapter, the HookUpz Universal IS-100 is designed to allow you to attach almost any smartphone to the eyepiece on a wide range of optical instruments including binoculars, telescopes, spotting scopes, night vision devices and even microscopes and thus allow you to take photos and/or videos of whatever it is that you are pointing them at.
Over the years I have reviewed a fair number of products from Carson Optics including their excellent 3D Series 10x42 binoculars, specialist bino carry cases like the BinoArmor Deluxe and their lens cleaning kits and something that has always stood out for me is that they are quite innovative company and don’t just follow the crowd.
Instead they often come up with a new concept as is the case with their BinoArmour or they take something that has been done, but refine and improve it to produce a better quality/performing product as is the case with their dry-cleaning compound in their lens cleaning kits.
So to see if they have managed to maintain this trend, I managed to get my hands on the Carson HookUpz Universal Smartphone Optics Adapter and below you can read my full review:
Packaging
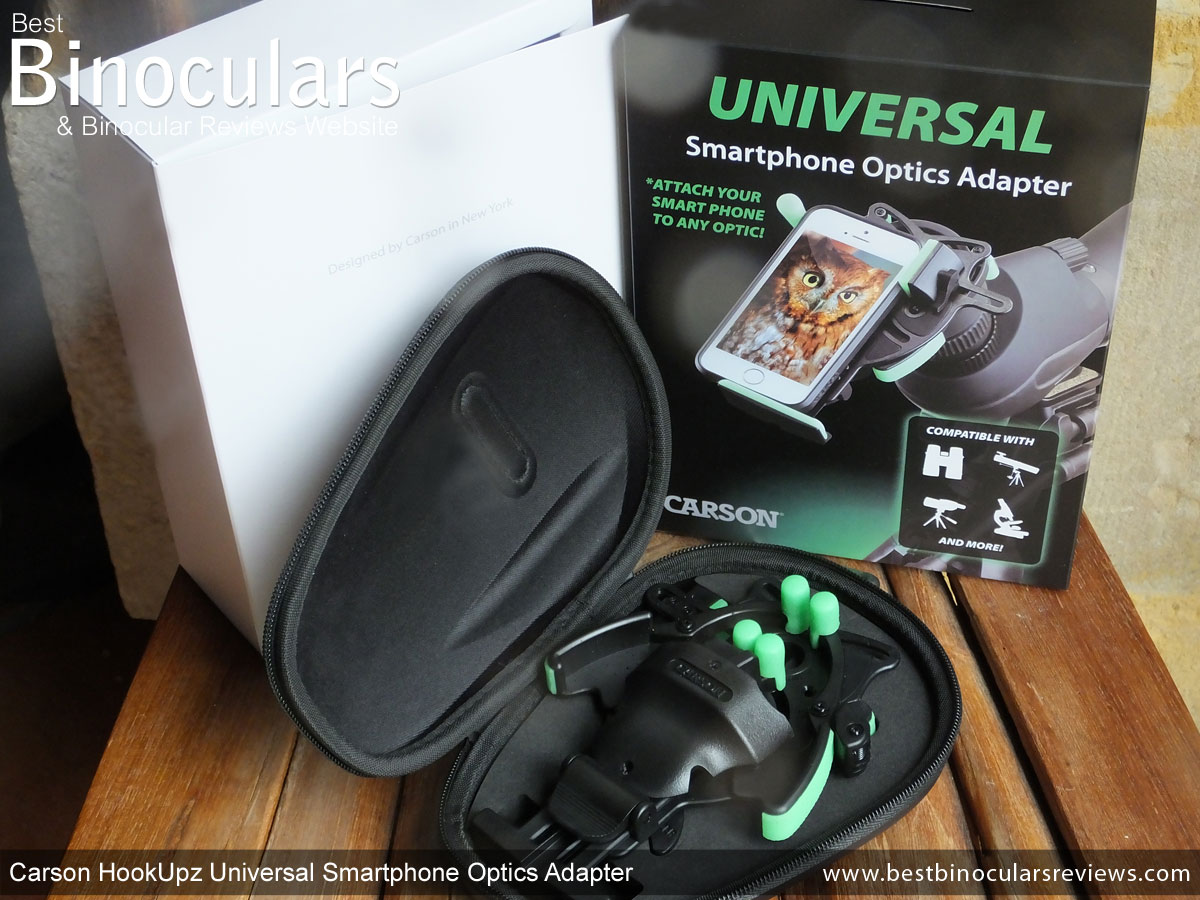
It is not often that I take the time to create a section on and write about the packaging on a product, especially for what is essentially an accessory, but I feel that the packaging that comes with the Universal HookUpz is worth a mention. Right from the moment I opened the external courier packaging and came across the main Carson box I was impressed. This obviously does not change the performance of the unit itself, but does show Carson’s attention to detail and the importance that they place on it.
The external black sleeve has a nice silky sheen to it and the graphics look great, this then protects a really classy and protective internal white box that opens like a book and has the words “Designed by Carson in New York” tastefully placed on the front cover.
Carry Case
Upon opening this box you are then presented with the excellent quality semi-rigid carry case, which to me looks like it is made from a Neoprene type of material. It has the Carson logo imprinted on the front and a Zipper that runs almost the whole way around it giving you access to the interior.
Inside the case the IS-100 Universal is kept in place and protected even further by a dense foam like material that is cut to it’s exact shape and is similar to what photographers have to protect their cameras and lenses. Perhaps the amount of protection is a little over the top, but it looks fantastic and rather have too much than too little.
Externally there is also a large climbers type D-shaped Quick Release Snap Hook. Made from frosted aluminium, it is threaded through a loop on the top of the case and is perfect for attaching it to your belt, rucksack, binoculars case or even your tripod making it easy to carry about and more importantly keep close at hand at all times.

The Universal IS-100 Adapter
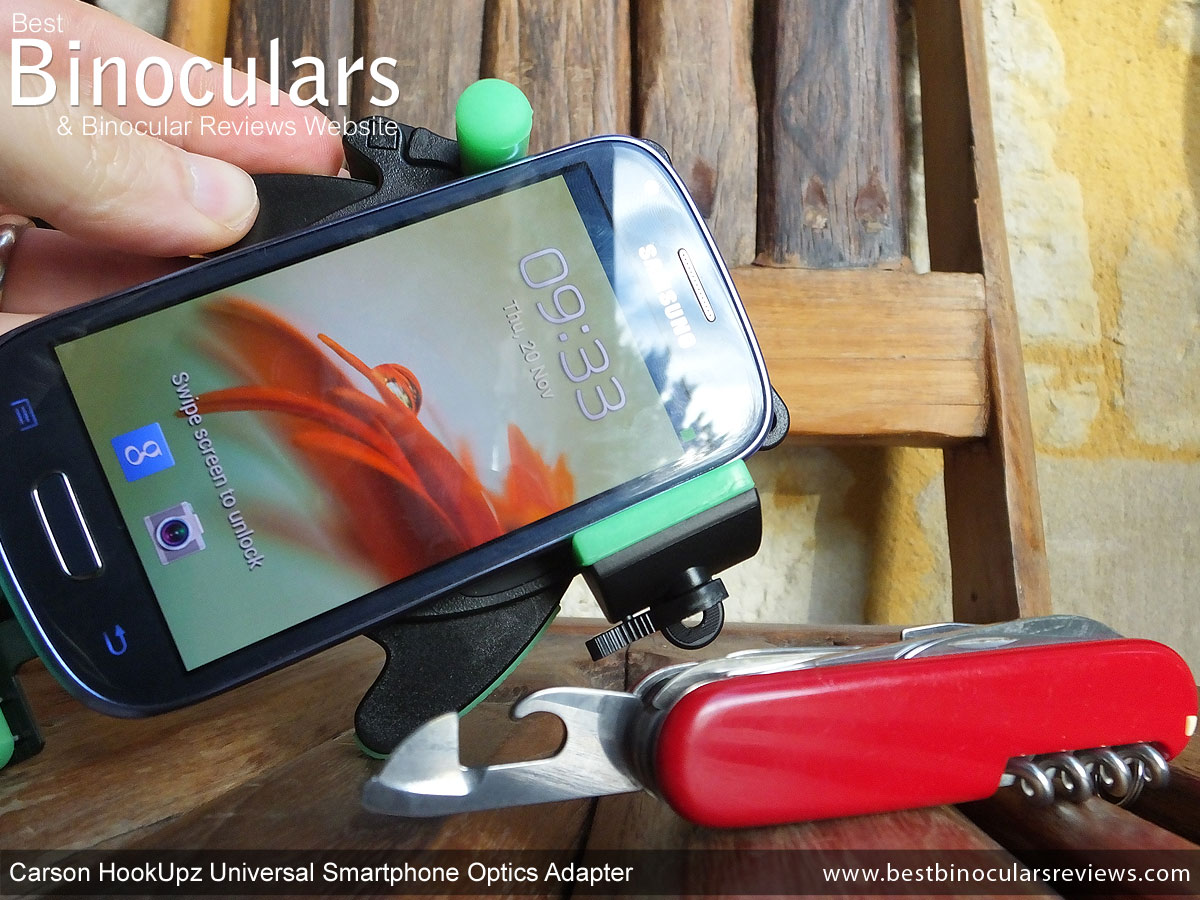
Whilst the main body of the adapter is mostly made from plastic, it looks for the most part to be well made as well as reasonably robust. The one slight concern I have in terms of strength is the lock or side clamp as Carson calls it, which is located on the horizontal grip arm. Whilst not flimsy, I did feel that I should not be overly rough with it to ensure that it did not break.
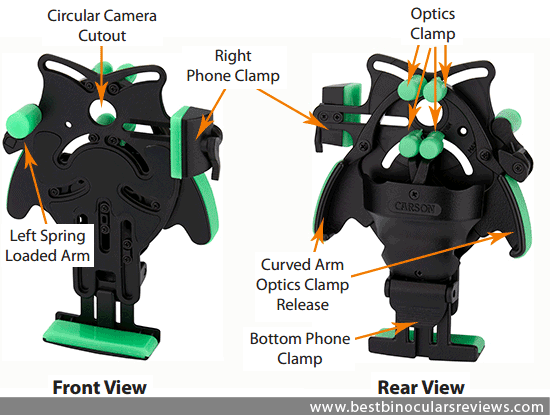
The adapter attaches to the eyepiece on your binocular, scope or other optics via the 4 spring loaded “optics clamps” that have a soft and grippy bright green silicone cover on them. Likewise, your phone is held in place with a couple of clamps that also have this silicone padding to them.
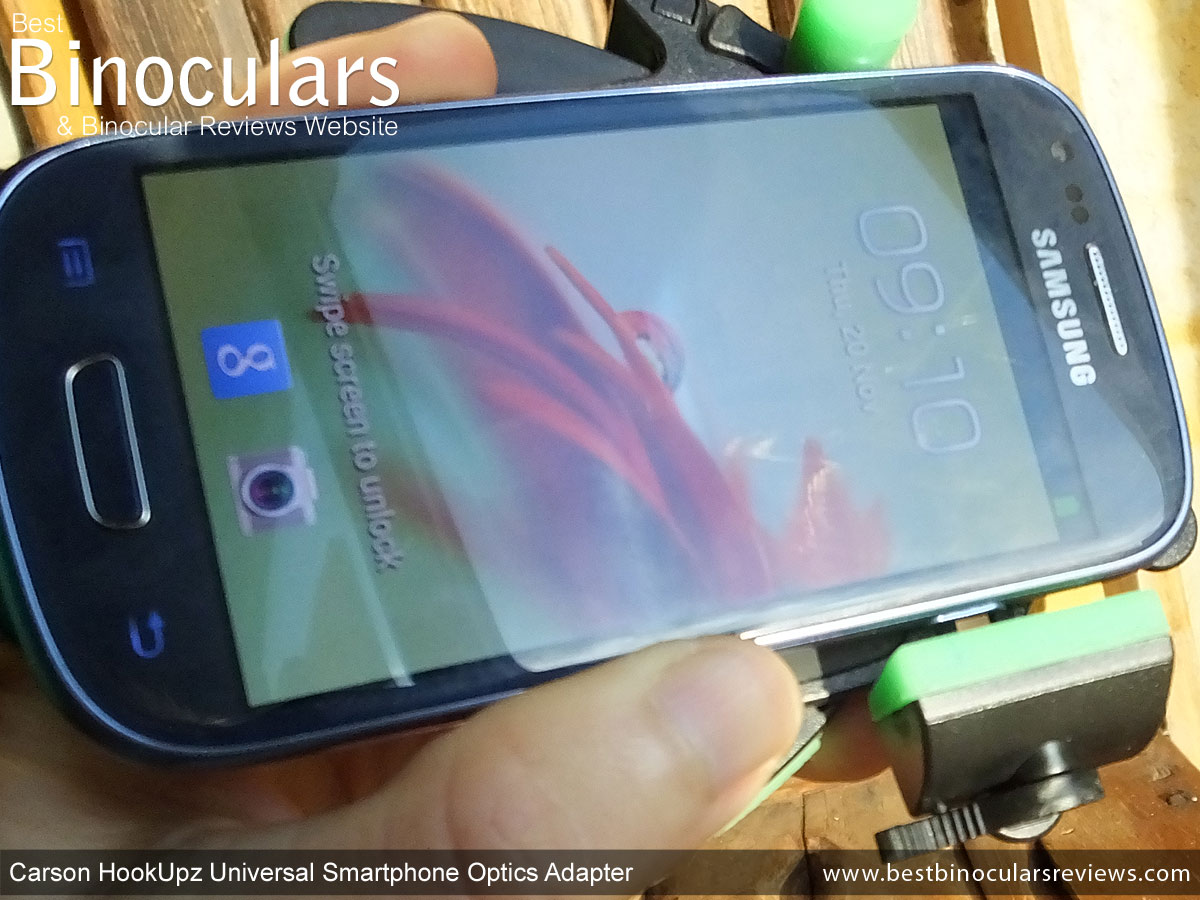
Inserting & Aligning your Phone
Before attaching the adapter to your optics, you first need to set it up to accommodate your phone. Fitting most phones to the adapter should be really straight forward and basically you just need to follow a couple of steps:
- First you line up and lock the phone in place horizontally using the “right phone clamp”, making sure that your camera is in-line with the Circular Camera Cutout on the adapter
- Next you do the same for the vertical plane, locking it in place with the Bottom Phone Clamp
Rather than trying to describe these steps in detail, it will be much easier to understand if you take a look at this great instructional video below that Carson have created:
Exceptions
Whilst the Carson Universal Adapter will easily accept most phones, there will always be some exceptions. Phones with cameras in unusual places, really large or small ones like the one I used may require a little more playing around with to get it to fit correctly:
Carson advertise that the Universal fits all popular iPhone and Samsung smart phones, but it does not fit phablet type phones (ex. – Samsung Galaxy Note). It will also not work with rifle scopes or optics with really stubby eye-pieces, like some night vision devices.
Carson have also made a special sizing guide that you can use to test if your phone will fit before you buy it. Simply print it out and place your phone over it to see if yours is compatible: Carson Universal Sizing Guide.
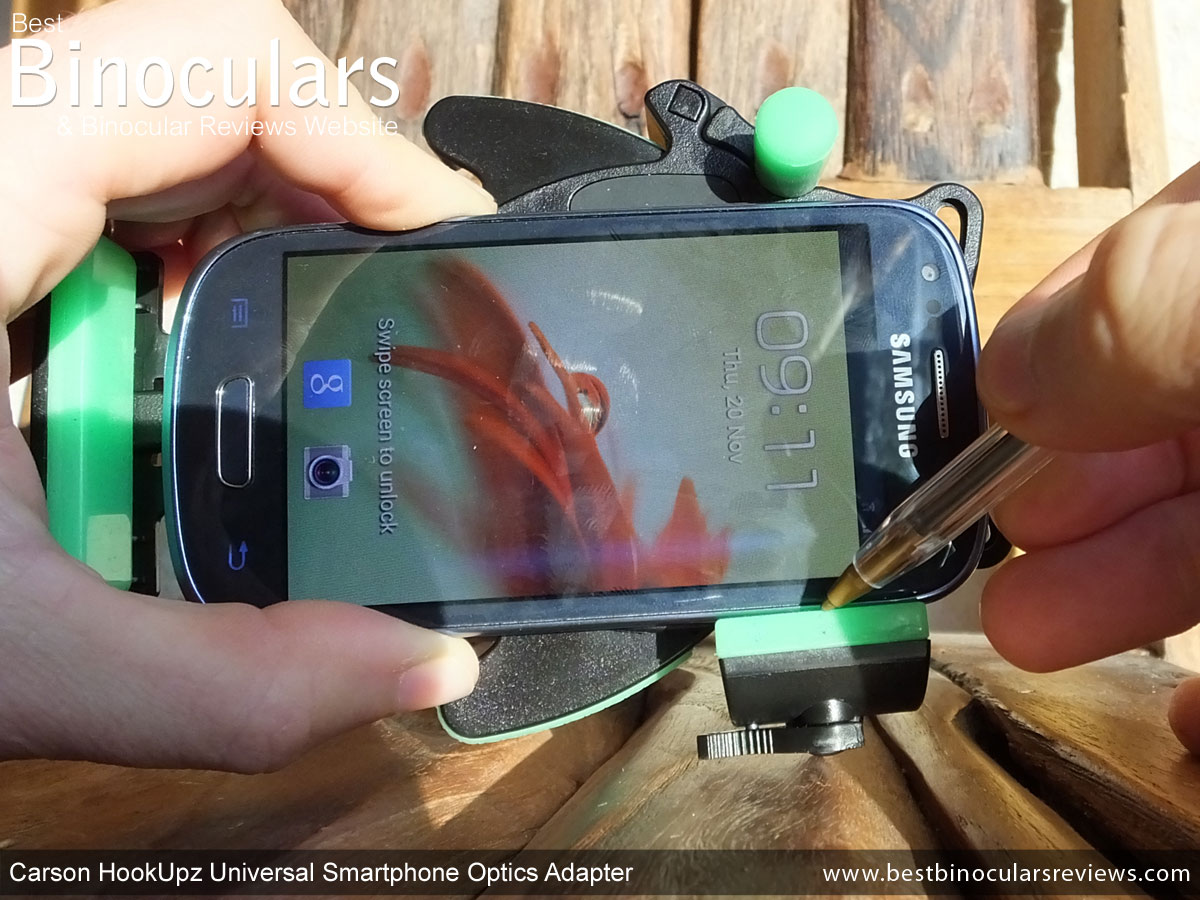
The phone I used for the review was a Samsung Galaxy S3 Mini, which has height and width dimensions of 12cm x 6.3cm. Whilst this narrow width was not a problem, height wise, the phone was just a little too short to properly fit into the cradle. As I said, for most standard sized phones this will not be a problem, but all I did was add a spacer, firstly I just used paper and then later progressed to some tin foil, but found some that I was still able to lodge it in there really well.
Small Phones with Side Mounted Power Buttons
As I said, the width was not a problem in terms of the adapter being able to hold it tightly, but being shorter than most phones and with Samsung having the on/off switch located on the side of the phone meant that the Right Phone Clamp would push this button, turning my phone off upon tightening it.
Once again and on my first few tests I just quickly created a buffer to stop this from happening. There would be many ways of doing this, but I just used a piece of paper and then the dust cap from the binoculars that I had already removed from them so I could attach them to the tripod. You can see both of these simple “modifications” I used in some of the photos on this page.
Whilst these both worked and I was able to take photos with the phone, the level of grip on the phone was reduced and so I had to be a little more careful than I would have liked.
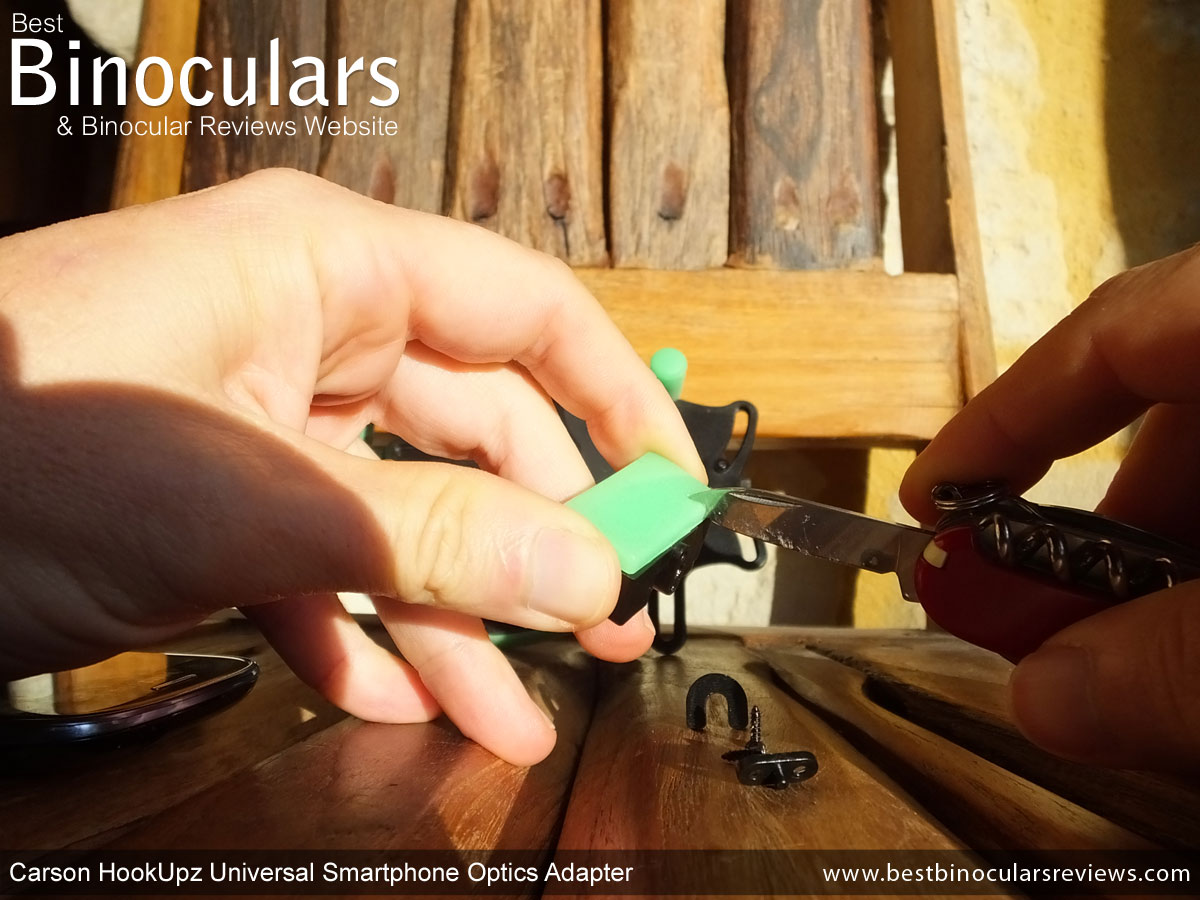
Thus after my few tests, I decided to modify the Carson IS-100 Universal a little more permanently:
 |
 |
| First I lined up the phone so that it was in the correct position and then marked where the button was coming into contact with the grip | Next, I unscrewed the clamp from the horizontal arm |
 |
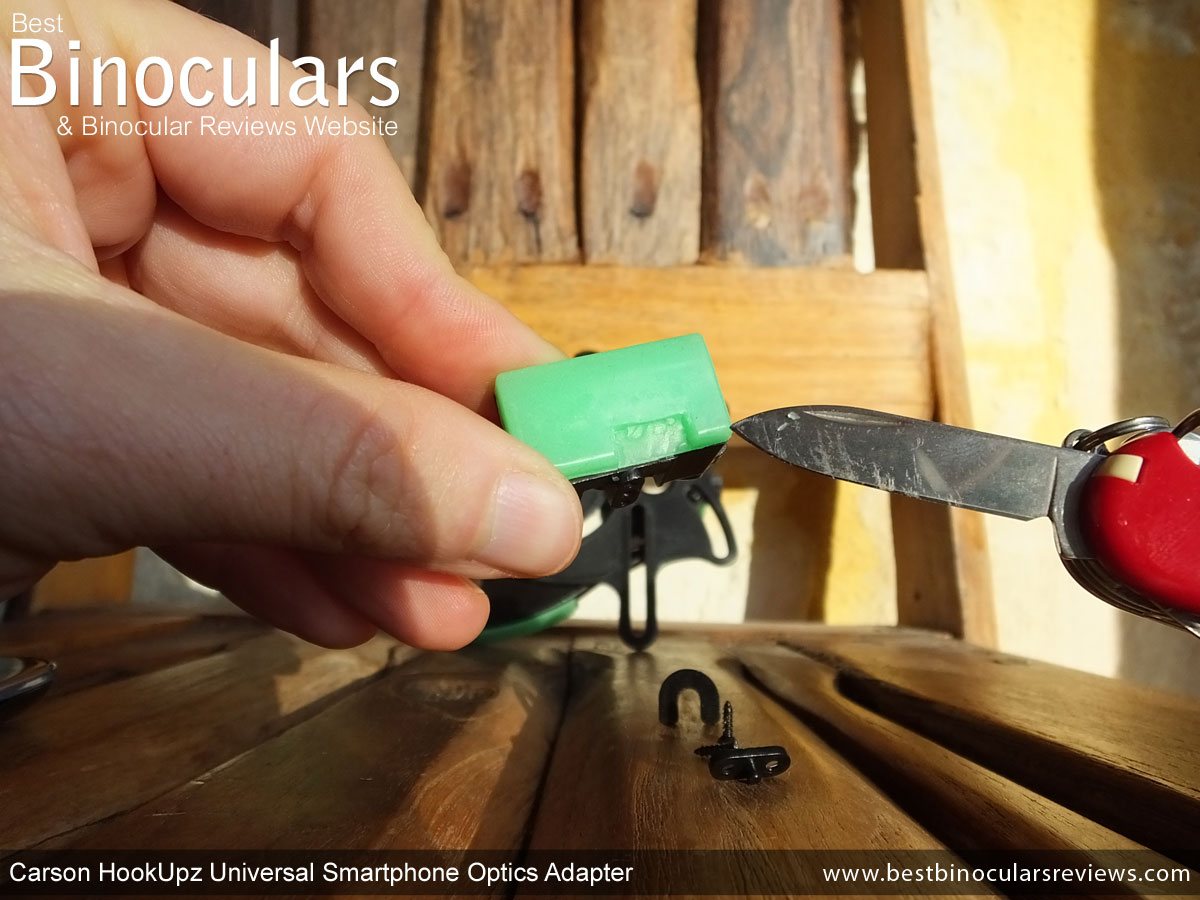 |
| Then I simply cut away the silicone where the button would be. Being silicone this is really easy to do with a sharp knife – like my trusty Swiss Army Knife! | |
Done! – it was really easy to do and as you can see from the clock on the phone took less than half an hour to do, more importantly it worked like a charm and now I was able to fully tighten the clamp and securely fix my phone to the adapter.
This also shows that even if your phone is a little out of the ordinary and does not fit, don’t panic as it is still possible to hatch a plan to make the adapter work for you.
Attaching the Adapter to your Optics
Once you have fixed and aligned your phone to the adapter, you simply open the claws of the Optics Clamp on the adapter by squeezing the spring loaded Curved Arm Optics Clamp Release and fit the four clamps over the eyepiece of your binocular/scope or what ever else you are using and then release.
Done!
The Universal is designed to fit any pair of optics with an eye-piece of between 20mm and 50mm in diameter and I found the spring loaded clamp locked onto my 41mm eyepiece tightly enough so that it would not move, yet not too tightly as to damage it or the rubber covering.
Which Binoculars & Scopes
Whilst the Carson Universal adapter will fit onto almost all scopes and binoculars, I think that it is worth quickly discussing which ones will work best.
Size
As with almost all photography, but especially when using powerful telephoto lenses (which is what you are effectively doing here), capturing and delivering as much light as possible to the camera is very important. Low light levels will not only result in dull images, but they are more lightly to be blurry as well as your camera may use a slower shutter speed to try and make up for this, thus even the tiniest movement will cause a blurry image.
So whilst you can use a small compact binocular, the results you get will most likely be compromised.
Standard full sized optics, like a pair of 8x42mm binoculars will be a good compromise between size, weight and light gathering ability, both for digibinning and for general use. However if you have larger binoculars like those used for astronomy with bigger objective lenses, then these are bound to work even better, especially if you plan to take photos in low light or even at night for astronomy.
Quality
As with simply buying binoculars or a scope to use with your eyes, better quality optics generally results in a higher light transmittance and an improved quality image being produced, which in turn will mean that your camera is presented with a better quality image to work with.
So if you do skimp and get the cheapest binocular you can, don’t be surprised if you are disappointed with the results! Obviously this is also true regarding the quality of pictures your phone’s camera can take.
Using the Carson Universal Optics Adapter
I found that once I had adjusted my phone to correctly fit the adapter, using it was really simple and not much more difficult that simply using the phone by itself.
The adapter was kept securely fastened to the eyepiece on my binoculars and did not move or come loose, even when using it in landscape mode where it is more off balance.
My overall impression is that the adapter is extremely well designed and works as well as many that are designed with a specific phone in mind. The advantage being that you don’t have to get a new adapter every time you upgrade your phone.
However there are a few recommendations, tips and tricks that I would like to pass on:
Tripod
Whilst not essential with lower powered (8x and lower) binoculars, I would highly recommend that if possible you have a stable base from which to take photos with. The best way of achieving this is of course by using a tripod. With high powered bins and almost all scopes, a tripod will be essential.
Spotting scopes are all designed to fit onto a tripod anyway and it is also really simple to attach most binoculars to one. This is usually achieved by simply unscrewing the dust cap on the front of the central hinge and then attaching a tripod adapter to this point, but there are other types of tripod adapters should your binoculars not have this.
For those who are interested and as you can see in many of the photos on this page, I used the same tripod that I currently use for all my photography and spotting scope reviews – the Vanguard ABEO Pro 283CGH Tripod and instead of using a standard pan handle or ball head, I prefer to use a pistol grip like the Vanguard GH-300T or GH-100 that is far more intuitive and thus makes it quicker to aim your optics.
Eye-Relief & The Lens Spacer
Carson Optics recommend that you twist in your eyecup or fold down the rubber ones depending on what type you have in order to place the camera lens as close to your optics eyepiece lens as possible.
This does make it much easier to get your camera to look down through your optics, but it also means that the dark ring around the edges is quite large and you have to use quite a lot of the digital zoom on your phone to counter this. This is fine, but using the digital zoom does reduce the quality of the photos that you will take, which you can see on my sample photos below.
To correct this problem, I found that with a little experimentation that it was better to try and get the camera closer to the correct eye-relief of the binocular, scope or whatever optic you are using.
This can be done by twisting the eyecup a little, or I found what worked even better was to simply click in the Lens Spacer that Carson includes with the Universal Optics adapter. I think they designed this spacer for Telescope eyepieces, but as I say works perfectly on the bins I tested the Universal with and mean that I could use far less digital zoom and thus get better quality images.
However keep in mind that by doing this, it also means that you have to be more careful and ensure that the phone is perfectly lined up with the eye piece as there is less room for error.
Sample Photos
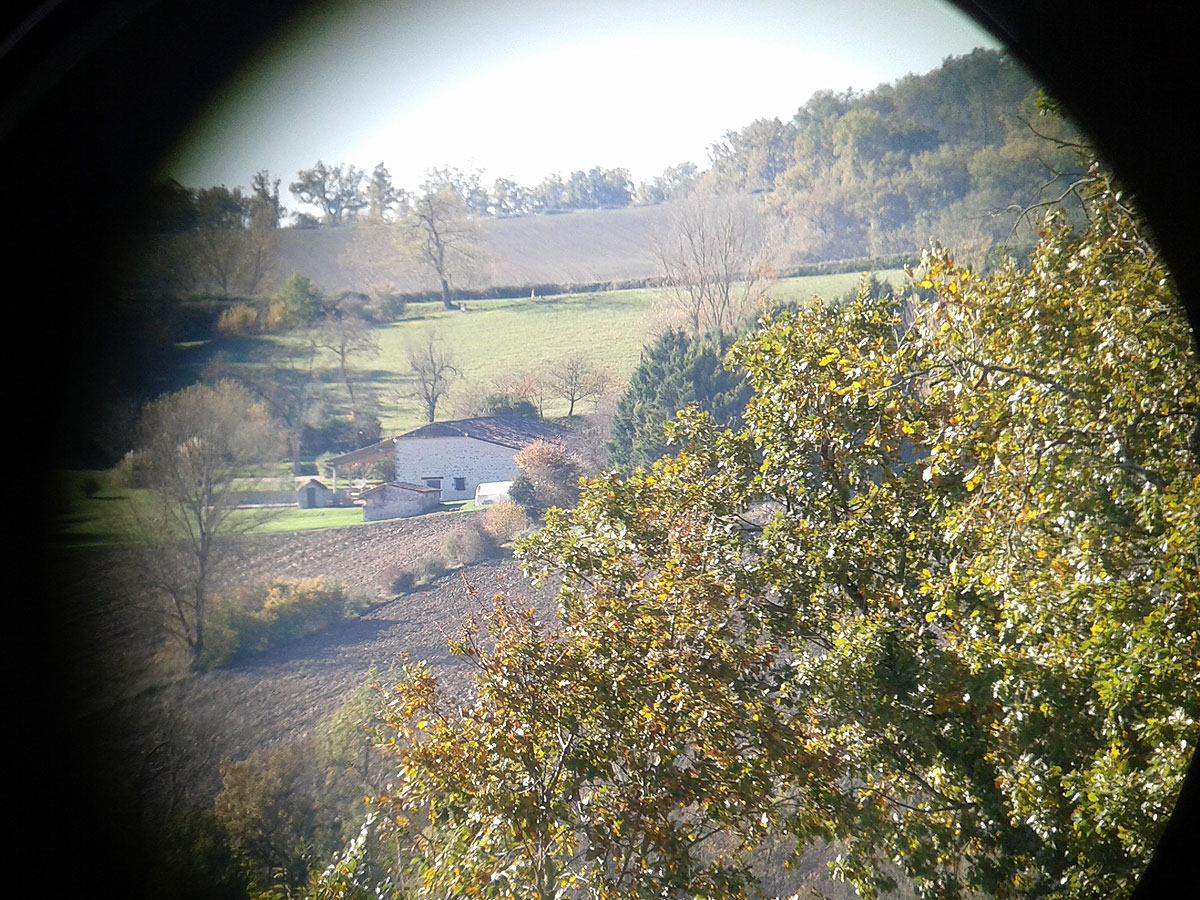
8x42mm Binoculars
The photos below were taken through a pair of Vanguard Endeavor ED II 8x42 Binoculars using my Samsung Galaxy S3 Mini phone.
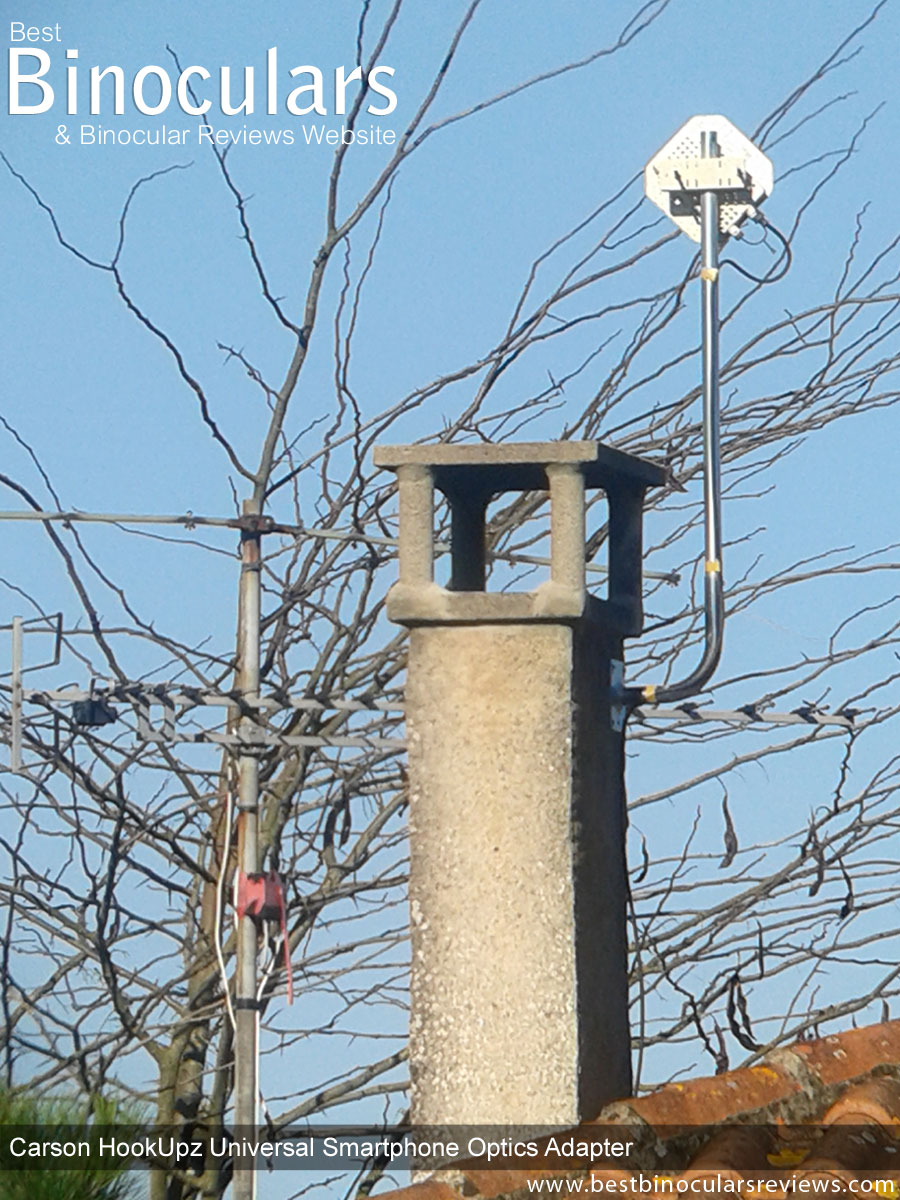 |
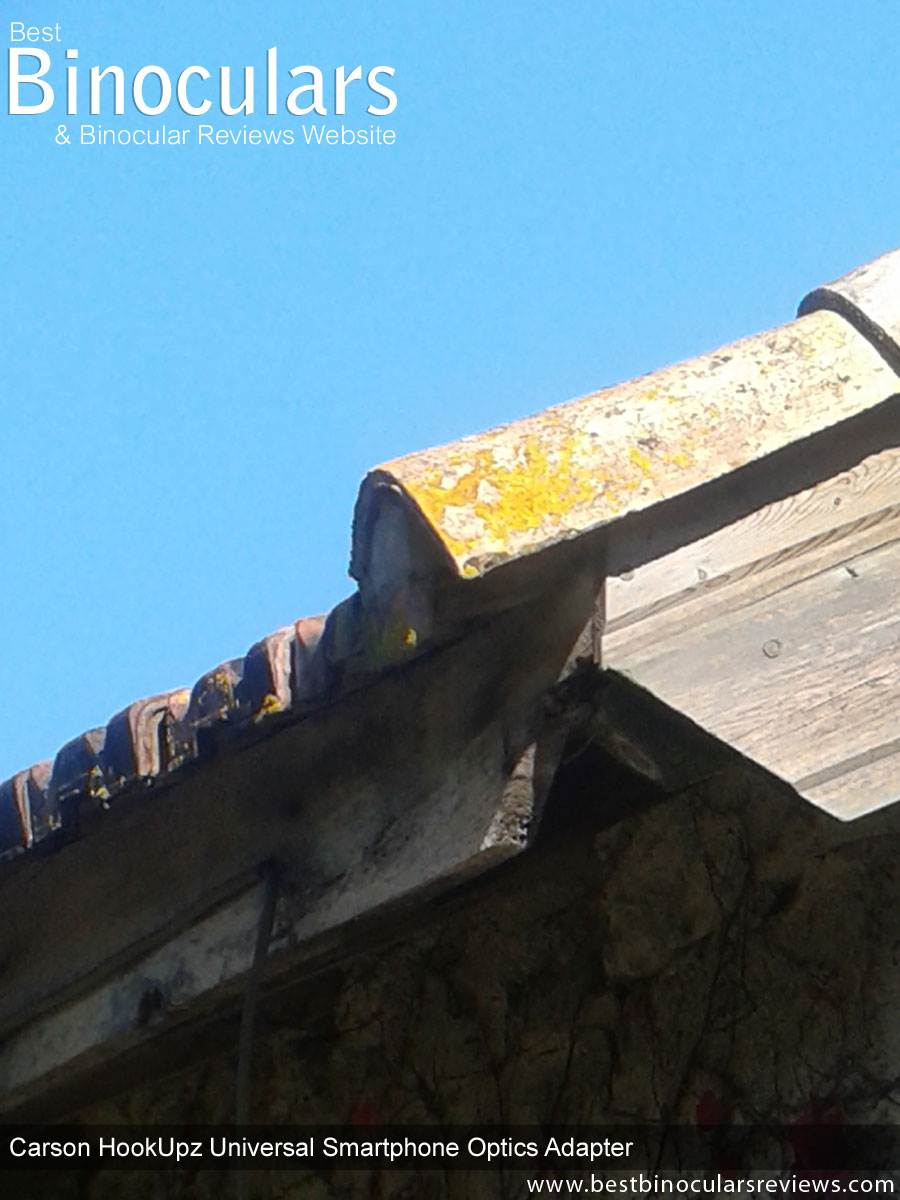
The photo on the left is of the chimney and areal of a nearby house.
By positioning the camera better using the included spacer and thus getting the camera closer to the correct eye-relief of the binocular, I was able to use less digital zoom to get the full picture without any of the black rings on the edges. I still had to use some zoom, but think this one was only about 2x and as you can see the quality is far better than those where a higher digital zoom is used. |
 |
 |
| The two photos above were taken of a farm house located a fair distance from mine. On the left is how it looks without using any digital zoom on the camera, whilst the one on the right is zoomed in to between 3x and 4x. I wanted to show the difference in quality you get once you use the digital zoom on the camera. Obviously this has nothing to do with the adapter, but thought it would be of interest. | |
 |
 |
| Once again the photo on the left was taken without using any of the digital zoom on the phone’s camera and the one on the right is pointing in the same direction with between 3x and 4x zoom applied | |
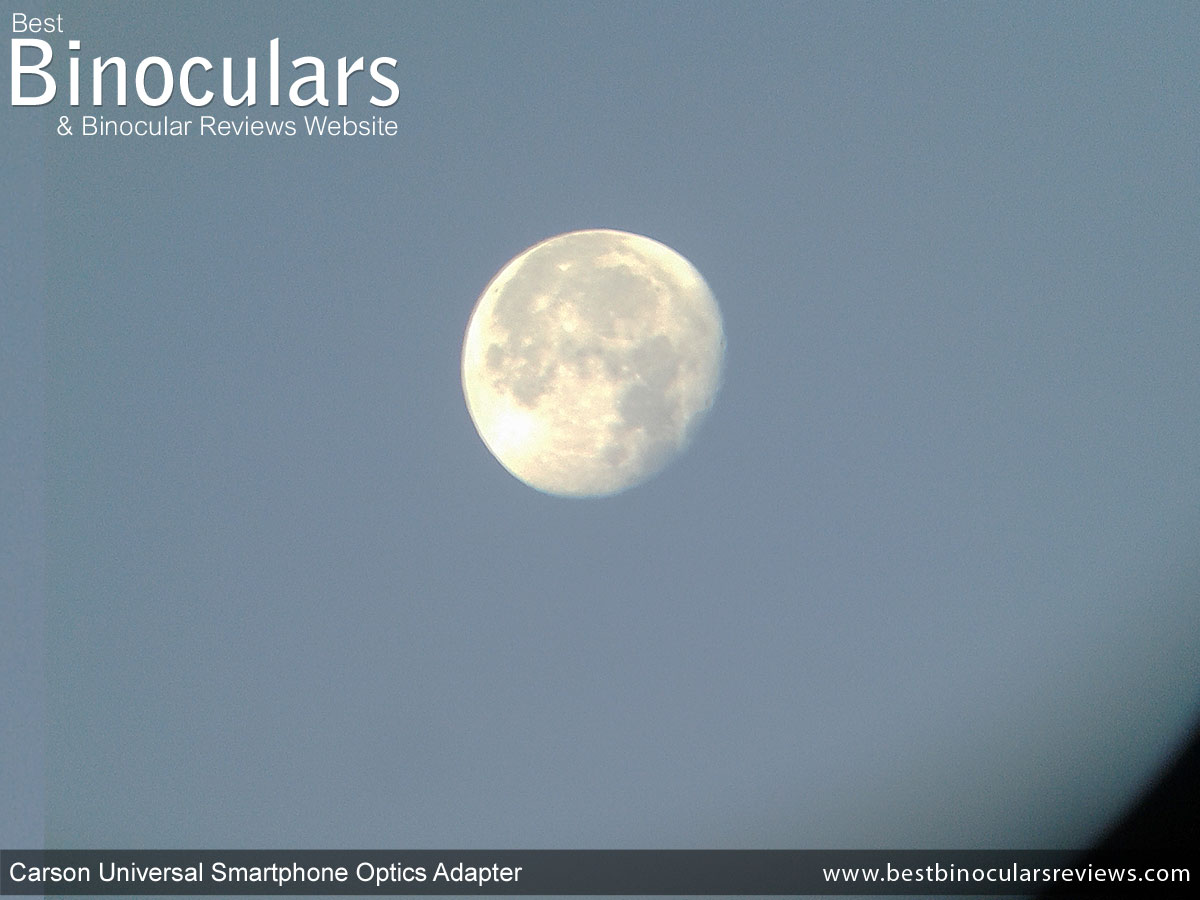
20x70 Binoculars
The following photos were taken through the Celestron Echelon 20x70 Binoculars. Once again I was my Samsung Galaxy S3 Mini phone.
 |
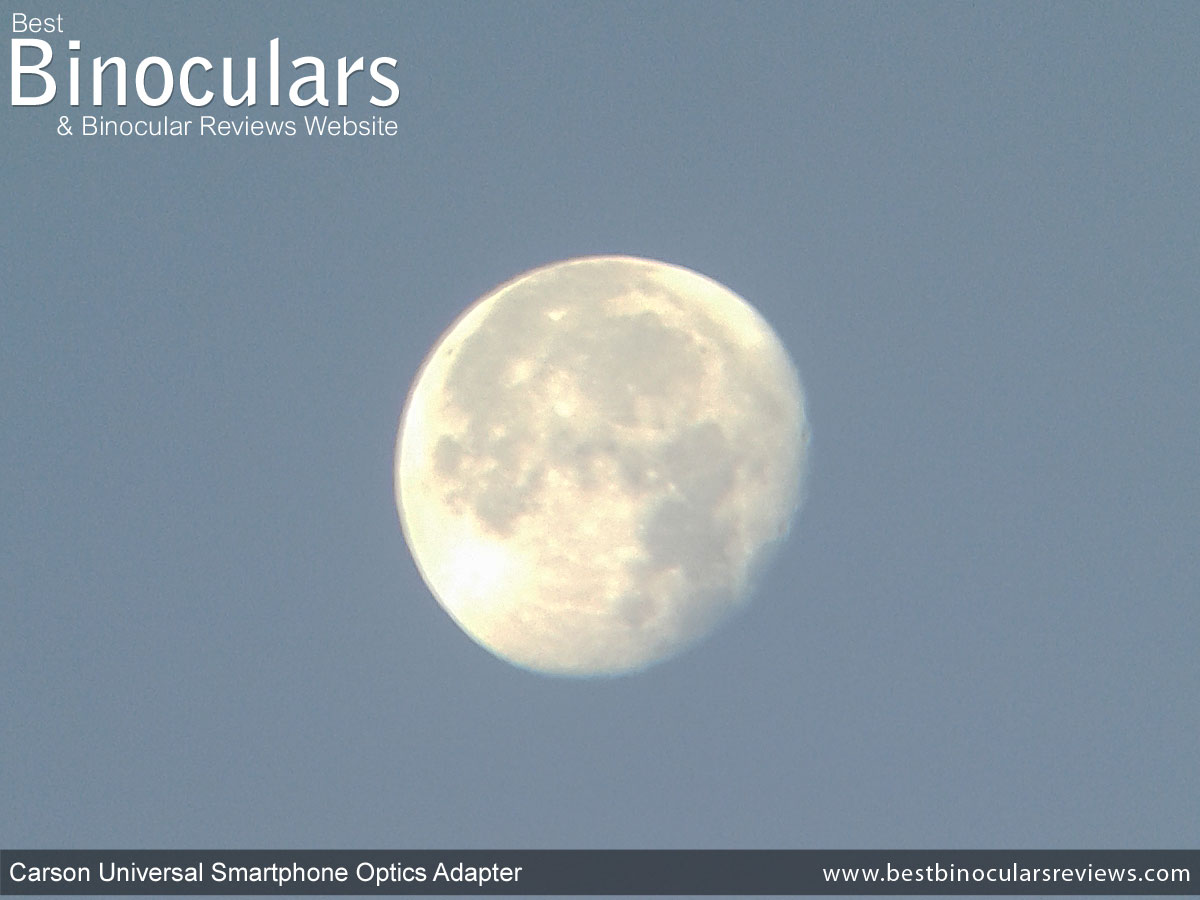 |
| I got up early to take some photos of the moon. My first attempts were terrible, basically the photos were completely over exposed, but by changing the exposure settings on the camera app, I was able to get some reasonable shots.
I am sure that with a better photo app on my phone, time and some more practice, they will get better. The one on the left is taken with no zoom on the camera, the right has about a 3x digital zoom I think and once again you can see the slight loss in quality because of it. |
|
Strengths:
The main strength of the Universal is the fact that you can take almost any phone and attach it almost any optic – enough said there.
Quick to Put on & Take Off
Once you have set it all up correctly, removing and replacing if from your spotting scope or binoculars is quick and very simple.
This for me is very important, as had it been a pain to do or take too much time, then I probably would not use it unless I was planning to go out and specifically take photos. This ease of use means that you can just carry the adapter with you whenever you are out in the field and as long as you also have your phone (which most people will these days), if something crops up unexpectedly that you would like to record, you can. The convenience of it is a true strength.
The overall build quality of the Universal is very good and the quality of the carry case and other packaging is also very high and well above what I was expecting.
Room for Improvement:
You can please some of the people all of the time, or all of the people some of the time, but never all of the people all of the time. I think in some ways this goes for the Carson HookUpz Universal IS-100 Optics Adapter.
I say this because whilst it’s real strength is it’s adaptability and the fact that it can fit almost any phone to almost any optic, it is also important to remember that there will always be exceptions. With some, like my smaller phone I was able to adapt and make it work, but I bet there will also be some where this is not possible. So whilst it is not really a weakness as such, I just think it is something to keep in mind.
I love the semirigid carry case that it comes in, but what would have made it even better is if they had designed it so that you could store the adapter in it with your phone still fixed onto it. Out in the field this would really be great as it would make the process of taking out the adapter and then taking photos even quicker and just think it would also be a great place to ensure that you phone is kept away from harm or being lost.
However, remember because the inside of the case is like those used by professional photographers and is made from dense foam cutouts, it is possible to cut out the shape of your phone into it as well and make this work. This is something which I think I will do and will add it to the review once done, but it would have just been nice if it didn’t have to.
For me it would also have been nice if Carson had supplied it with a few extra strips of the Silicone pads, that way for those like myself who have short phones, building up the Bottom Phone Clamp would have been easier – but this is really just being picky!
Carson Promo Video
Also In the Box
On the inside front cover of the white box, there is a quick reference guide which as you would expect gives some brief instructions with diagrams on how to use the IS-100 and I guess is for those of us who don’t like to read the full instructions immediately!
The full instruction booklet is pretty comprehensive and contains very clear instructions as well as diagrams on how to insert and align your phone, attach it to your optics, troubleshooting, useful tips, hints, specifications and customer service details.
Conclusion
I have no hesitation in highly recommending the Carson Universal Optics Adapter for both digiscoping and digibinning with your phone. Sure there are some that are designed for a specific phone that may be less bulky, indeed Carson make some themselves. But for me this little extra bulk was not really a problem at all and anyway the comfort in knowing I can still use this adapter when I upgrade my phone and not have to get a new adapter as well, more than makes up for this.
 Where to Buy & Prices
In the US the Carson HookUpz Universal Smartphone Optics Adapter has a list price of $75, but is currently available for around $55. Take a look at the links below to current prices as well as to compare them with others:
Alternative Methods
Using your phone is only one way of taking photos through your optics. A big advantage of this method is convenience as most people will have their phone with them anyway. But on the down side the quality of photos most phones take does not match that of better cameras, but this is changing and they are getting better all the time.
So what other methods are there:
Digibinning
One option is to use an integrated digital camera binocular and whilst they may sound like an excellent idea, generally they are not! Due to a number of technical reasons, if you use anything other than the very expensive Sony DEV Digital Video binoculars you probably end up with something that is little more than a toy or at best a gimmick with either the quality of the view through the binocular compromised and/or the quality of the photos/video you take being a very low quality.
Some companies like Swarovski offer a camera adapter for a number of their binoculars, but even so this is restricted to their products and only if you have a compatible compact camera.
Digiscoping
Digiscoping (taking video/photos through a spotting scope with a camera) is far more successful and thus much more popular. This is mainly I think down to two reasons: Firstly, scopes are already quite large devices and thus attaching more bulk in terms of a camera is not really an issue. Secondly, because a scope has a large objective lens, they let in a lot of light, which enables you to take excellent quality photos through them, thus they are the choice for those seeking the best results possible.
The major downside to digiscoping is that it is not cheap and not something that you can casually do because not only do you need a good quality scope, but a quality camera, tripod and then the right adapters to connect them all together.
Further Reading

 Categories: Accessories, Carson |
  Tags: camera, Digibinning, Digiscoping, Snapshot Adapter |
  No Comments »
 USA: SnapZoom Adapter
 UK: SnapZoom Adapter